NaSA PoD Update #5

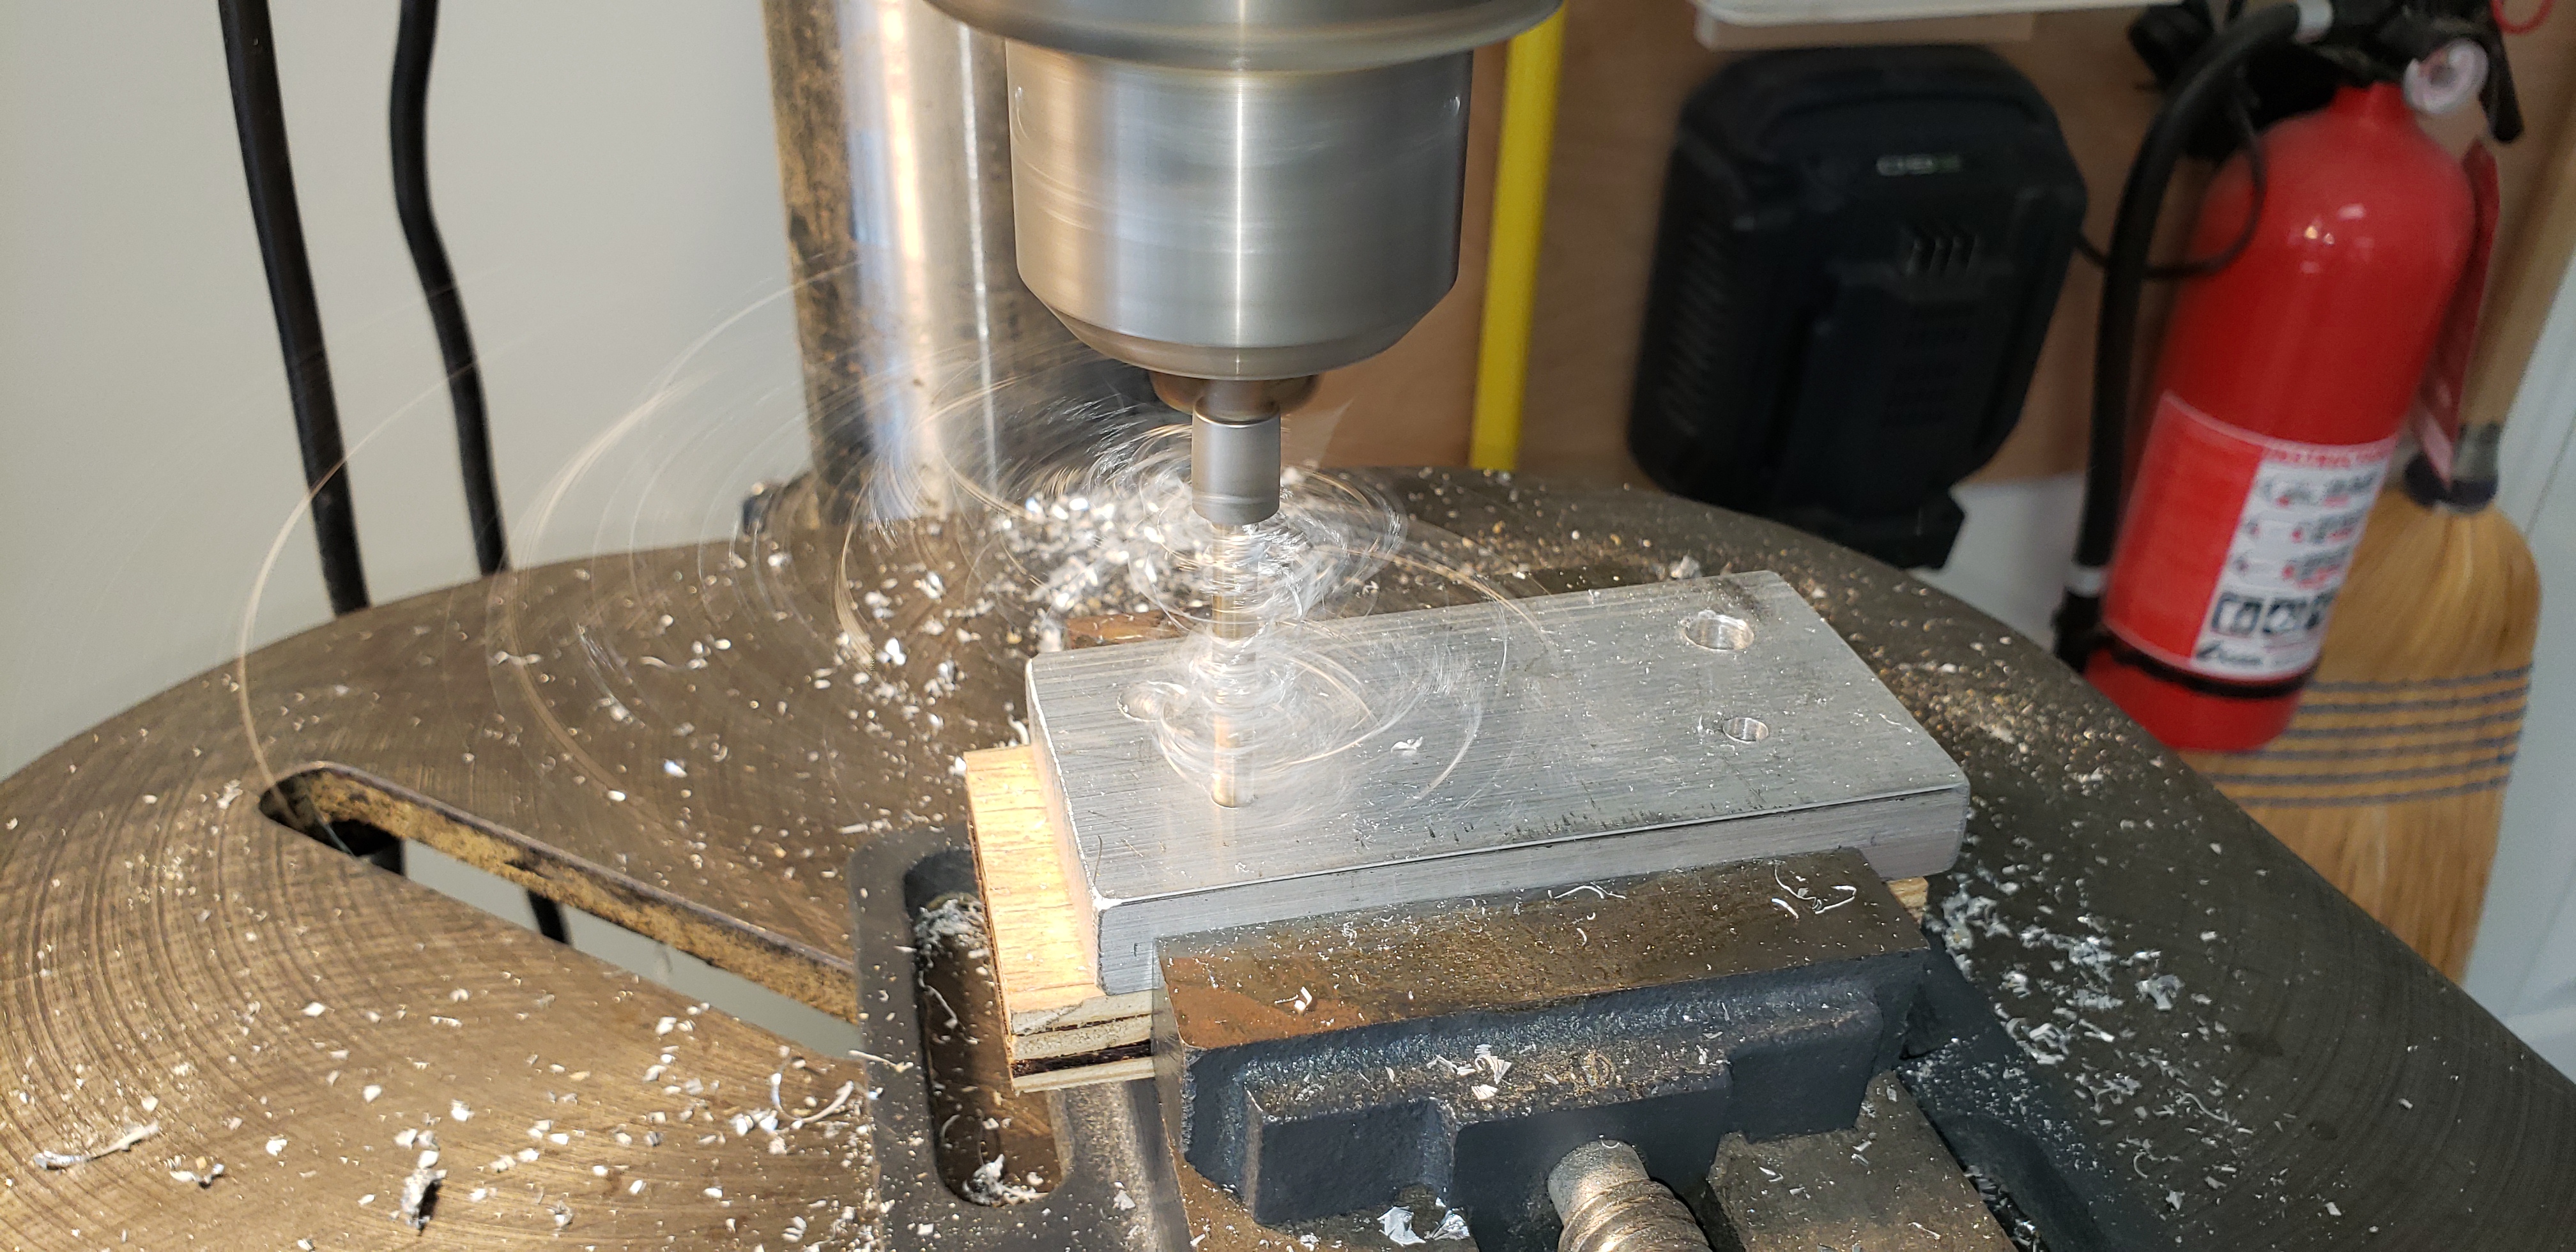
Recently, Jim and I worked together to carefully machine some specialized support pieces for the Solar Inverter Battery Support Structure (SIBaSS – pronounced “Sea Bass” – LOL).

Take a look at some of the photos from that adventure below.

Drilling precision holes in a block of aluminum is fun!

Drilling a hole in a piece of T-Slot aluminum.

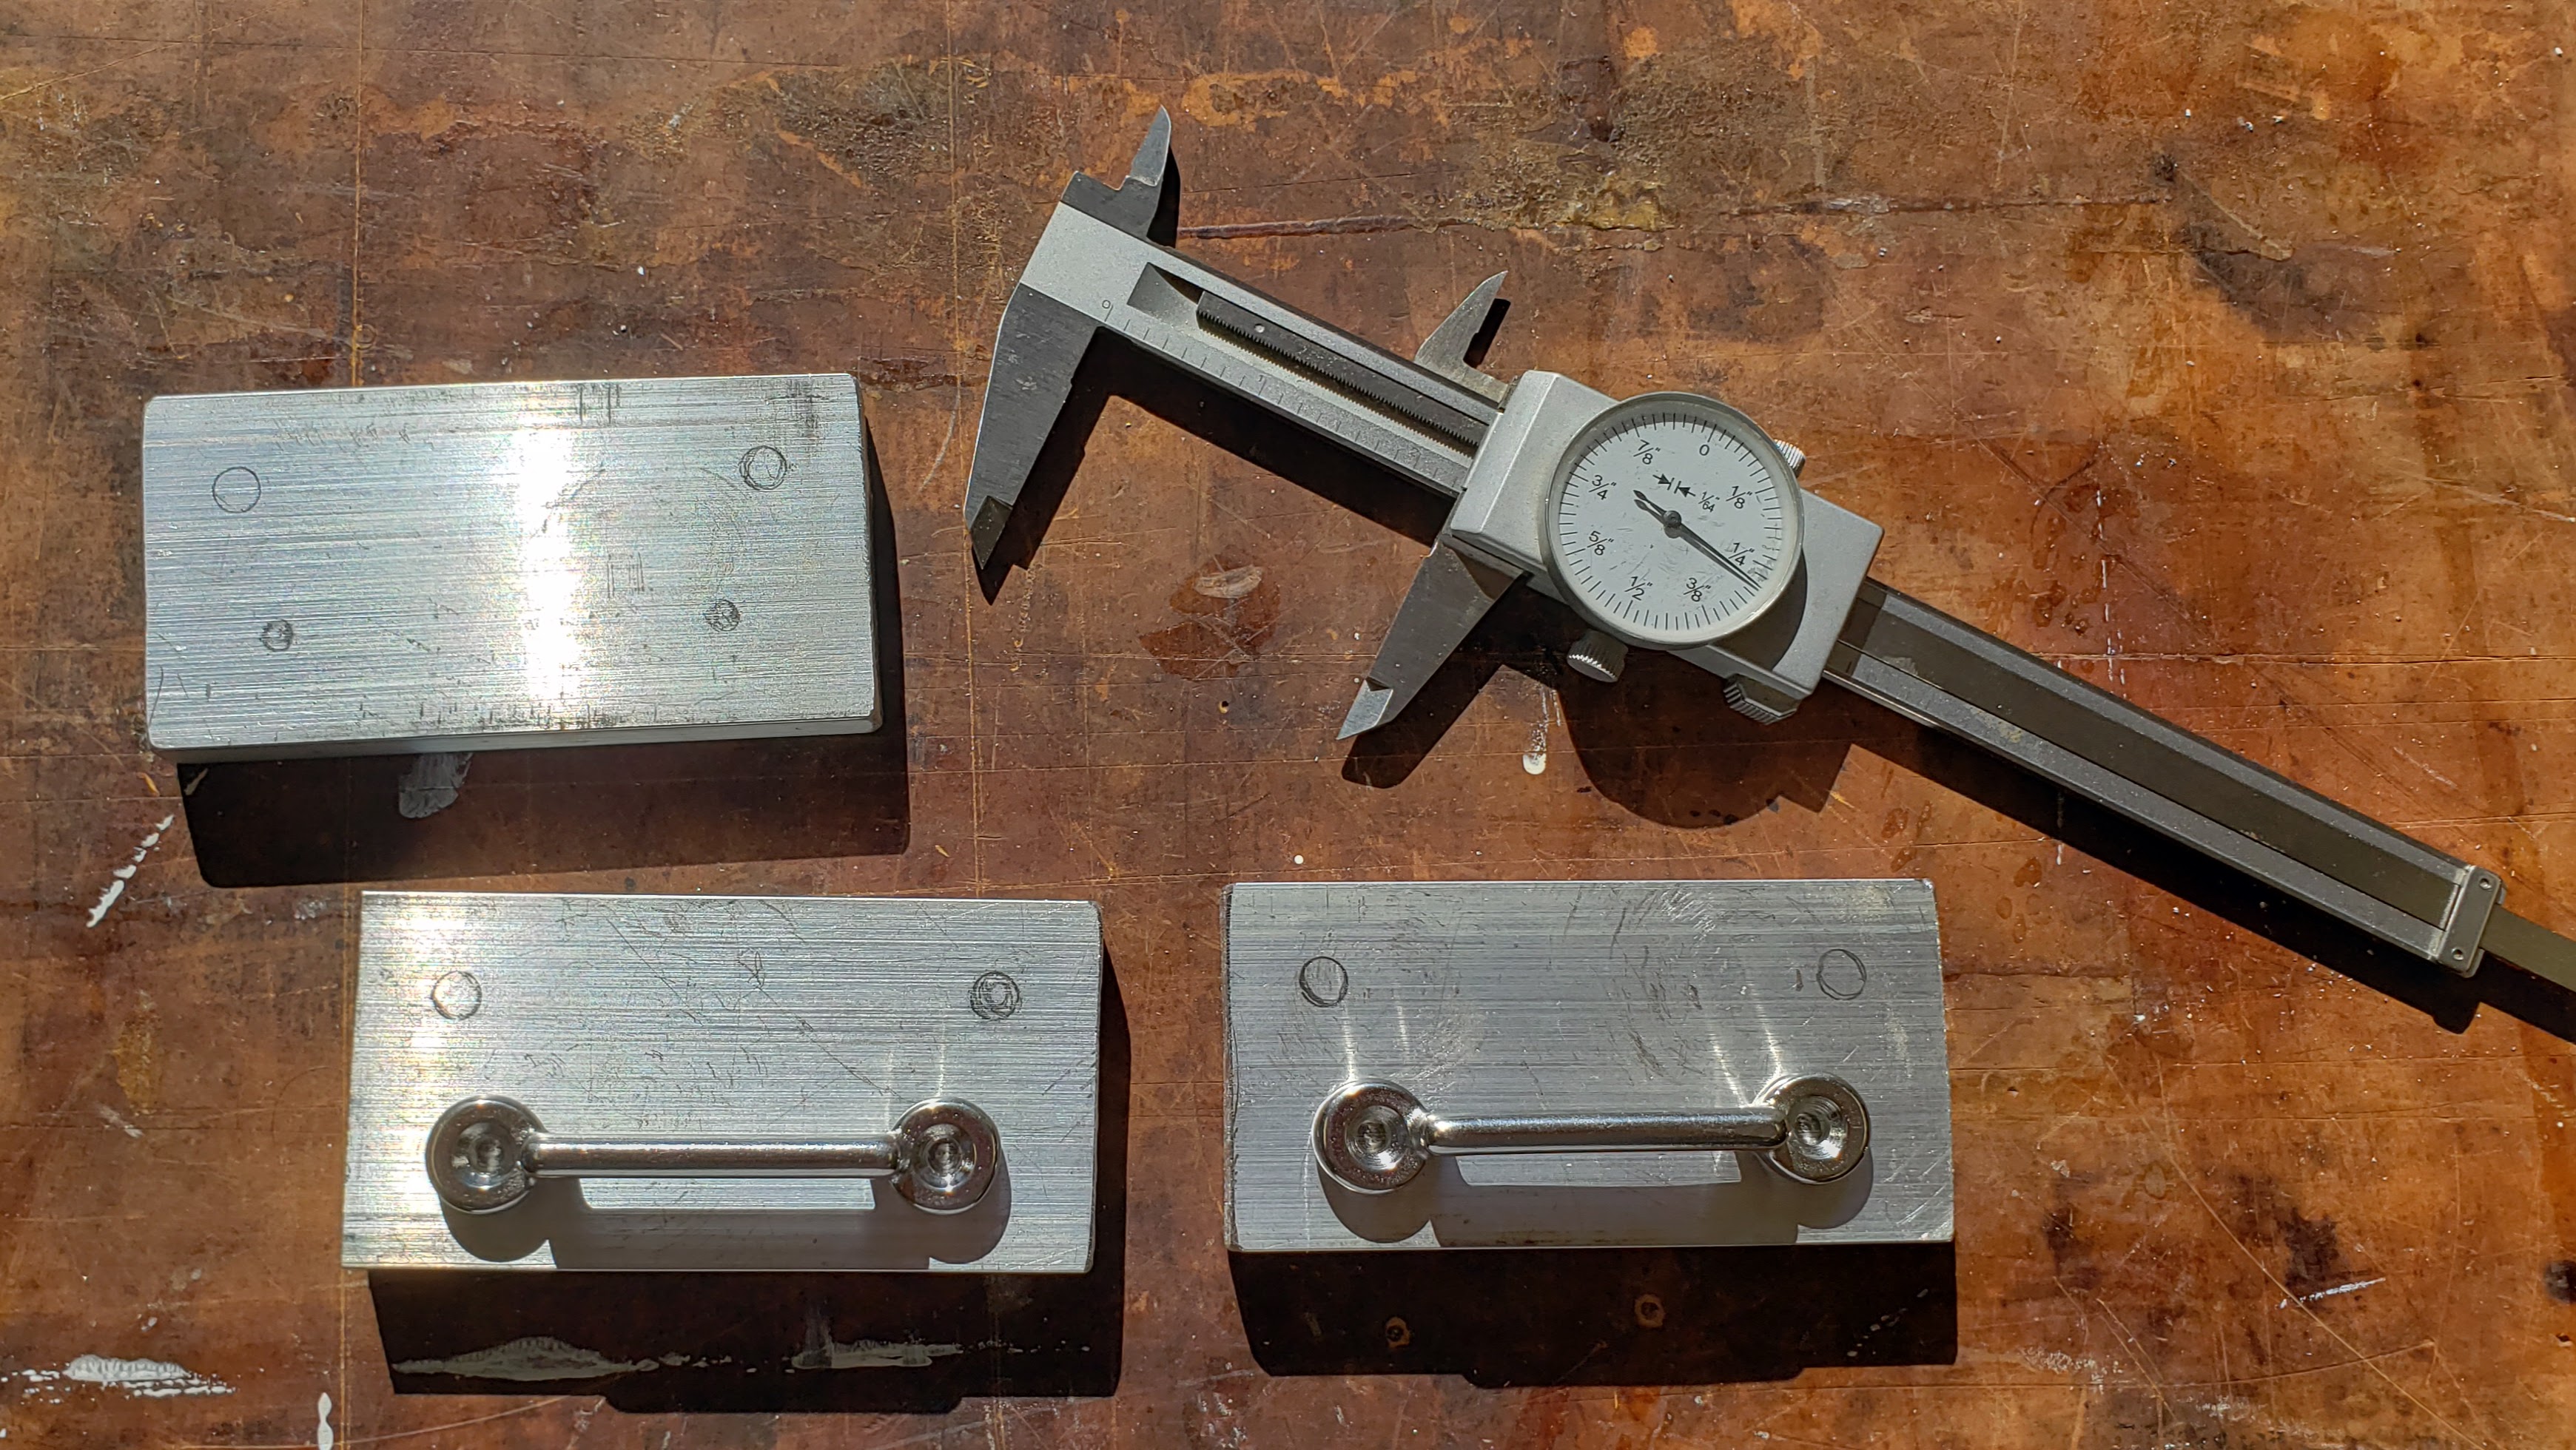
Aluminum blocks, strap cleats, and T-Slots in the process of being assembled.

Precision work.

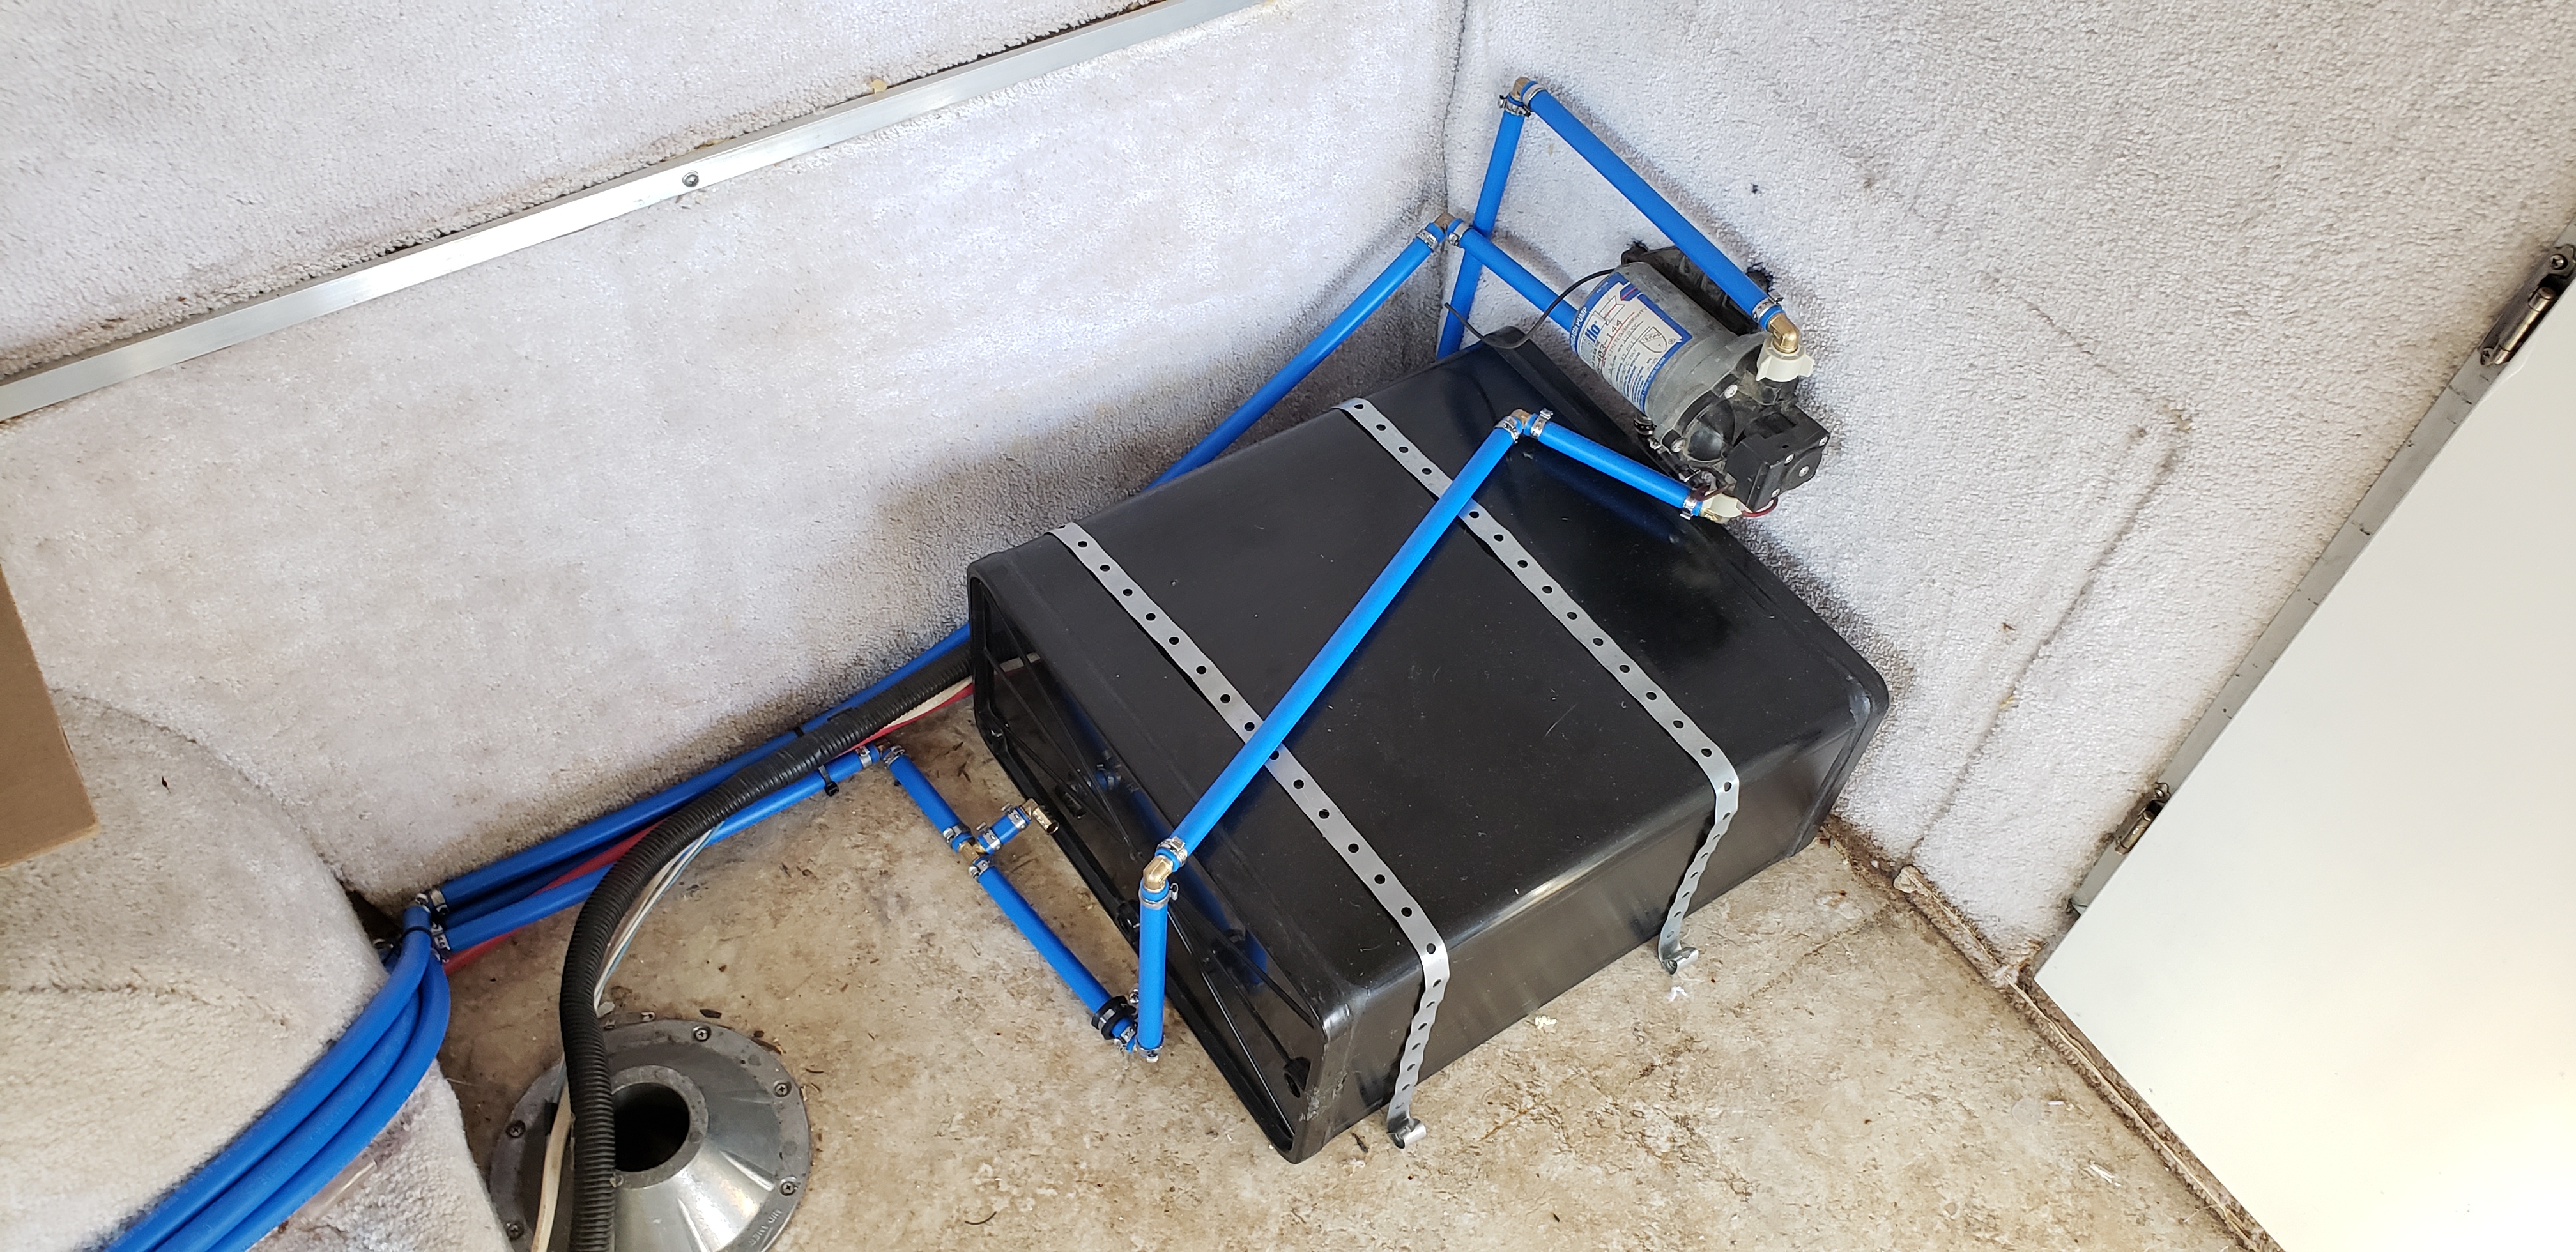
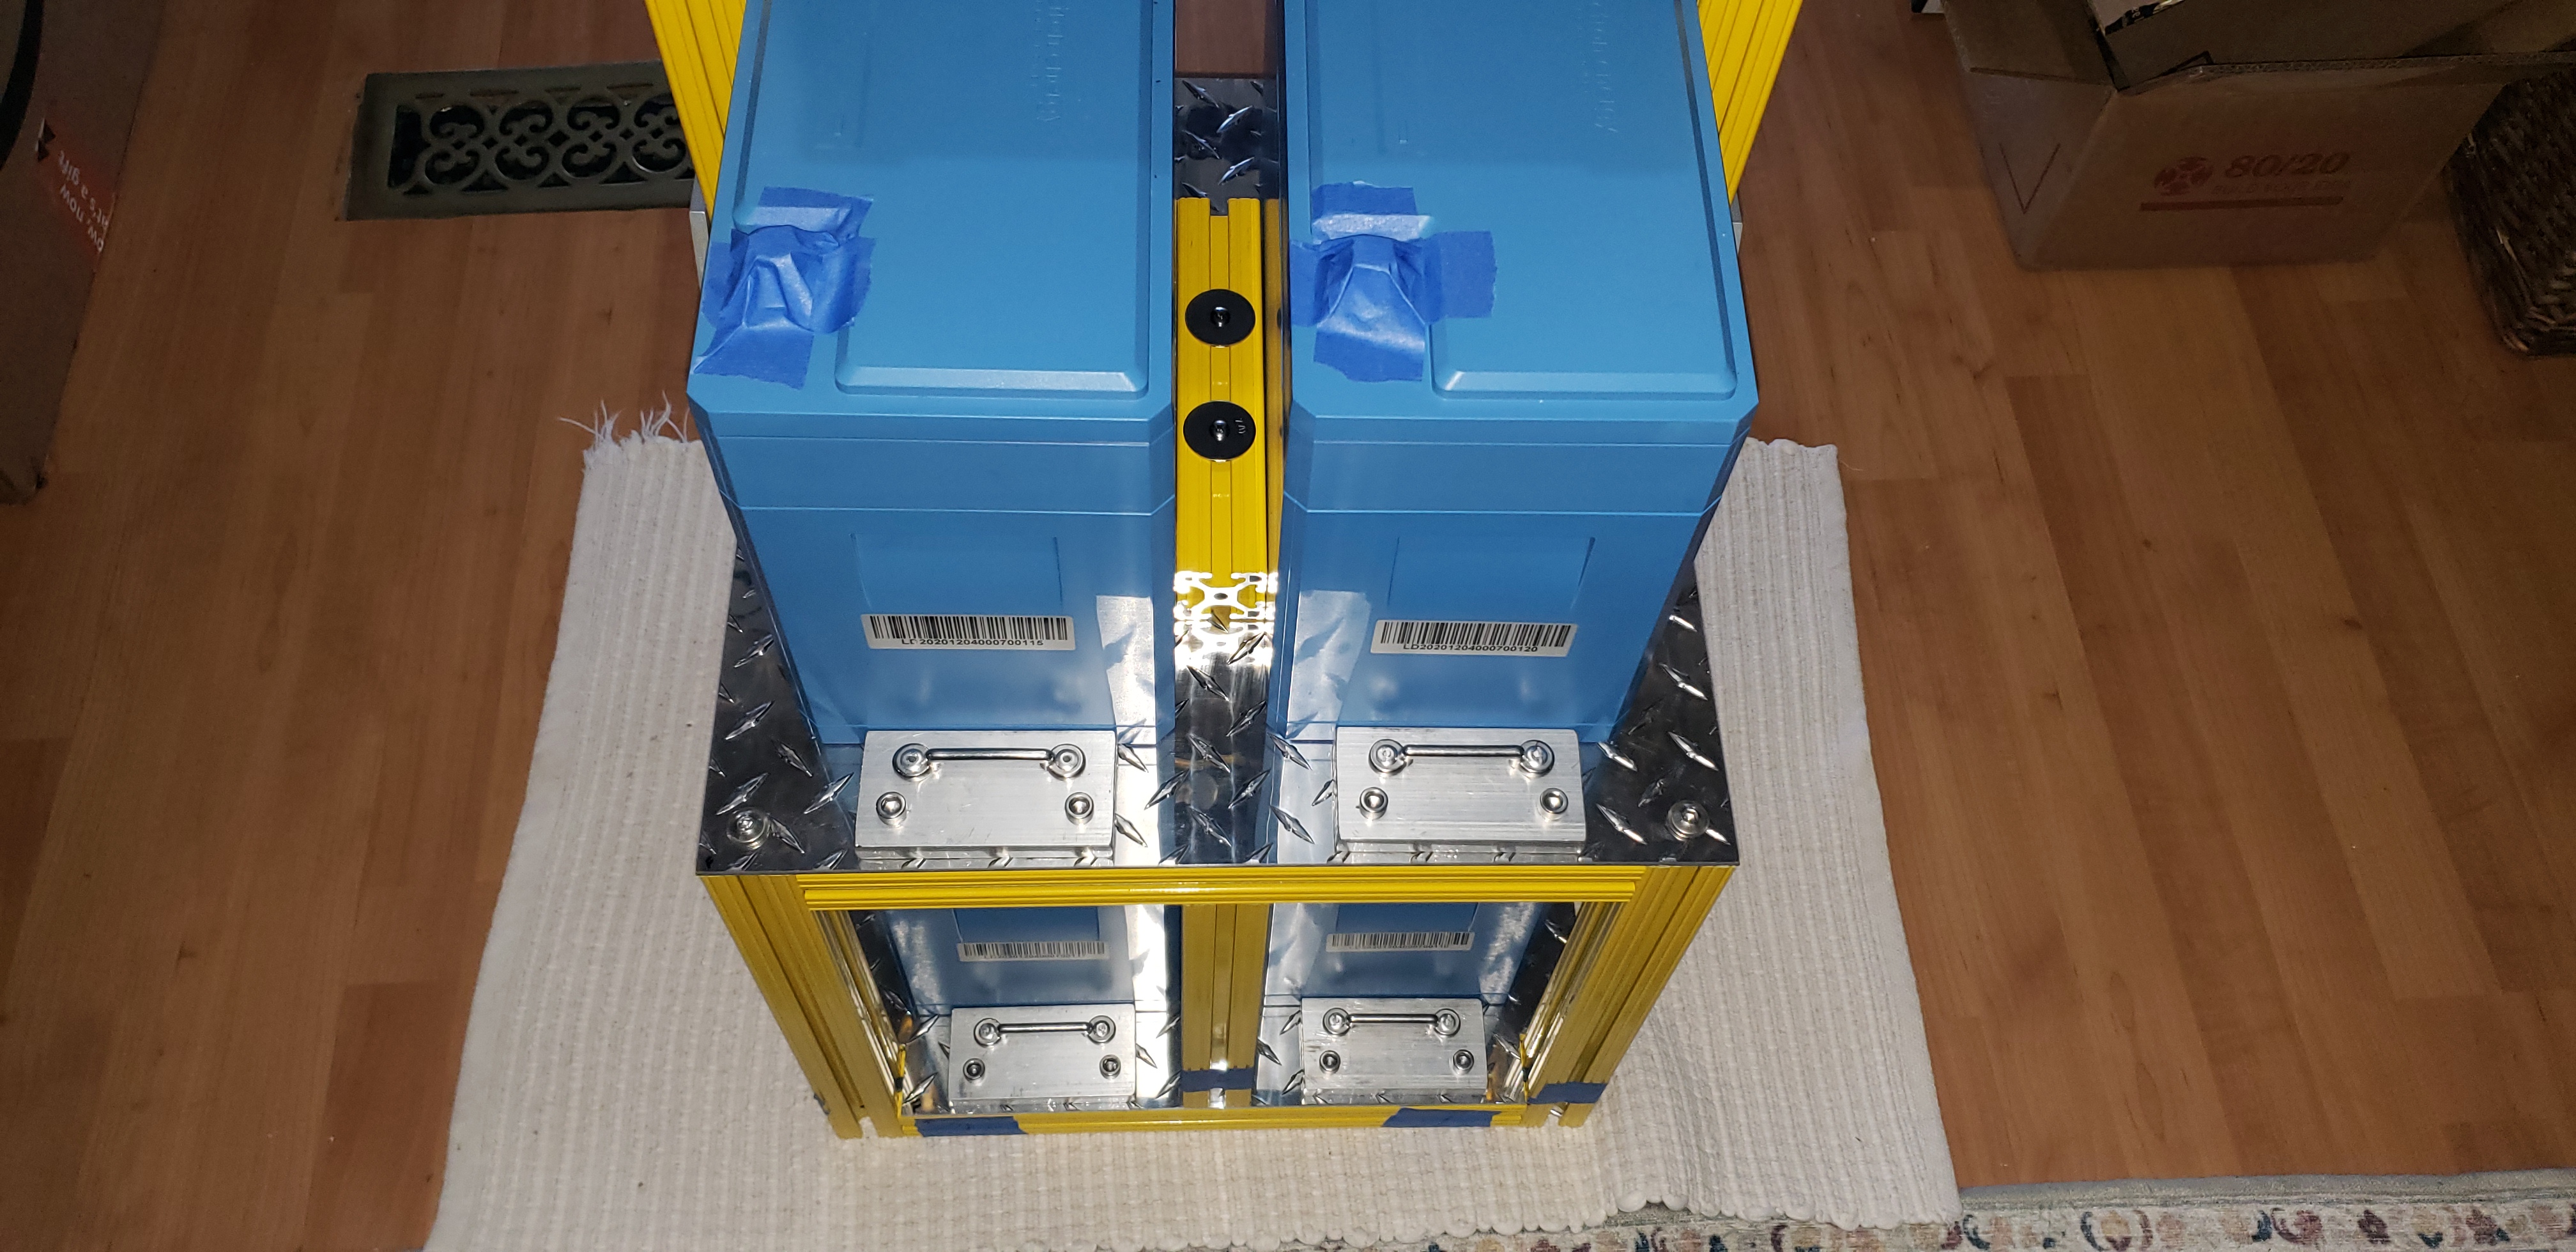
All these parts were then applied to the SIBaSS and, with the webbing straps I will add soon, will all work together to hold the batteries and inverter securely in place.

At this point in the build, this is what the SIBaSS looks like. The solar inverter is on the top of the structure and the four batteries are below.

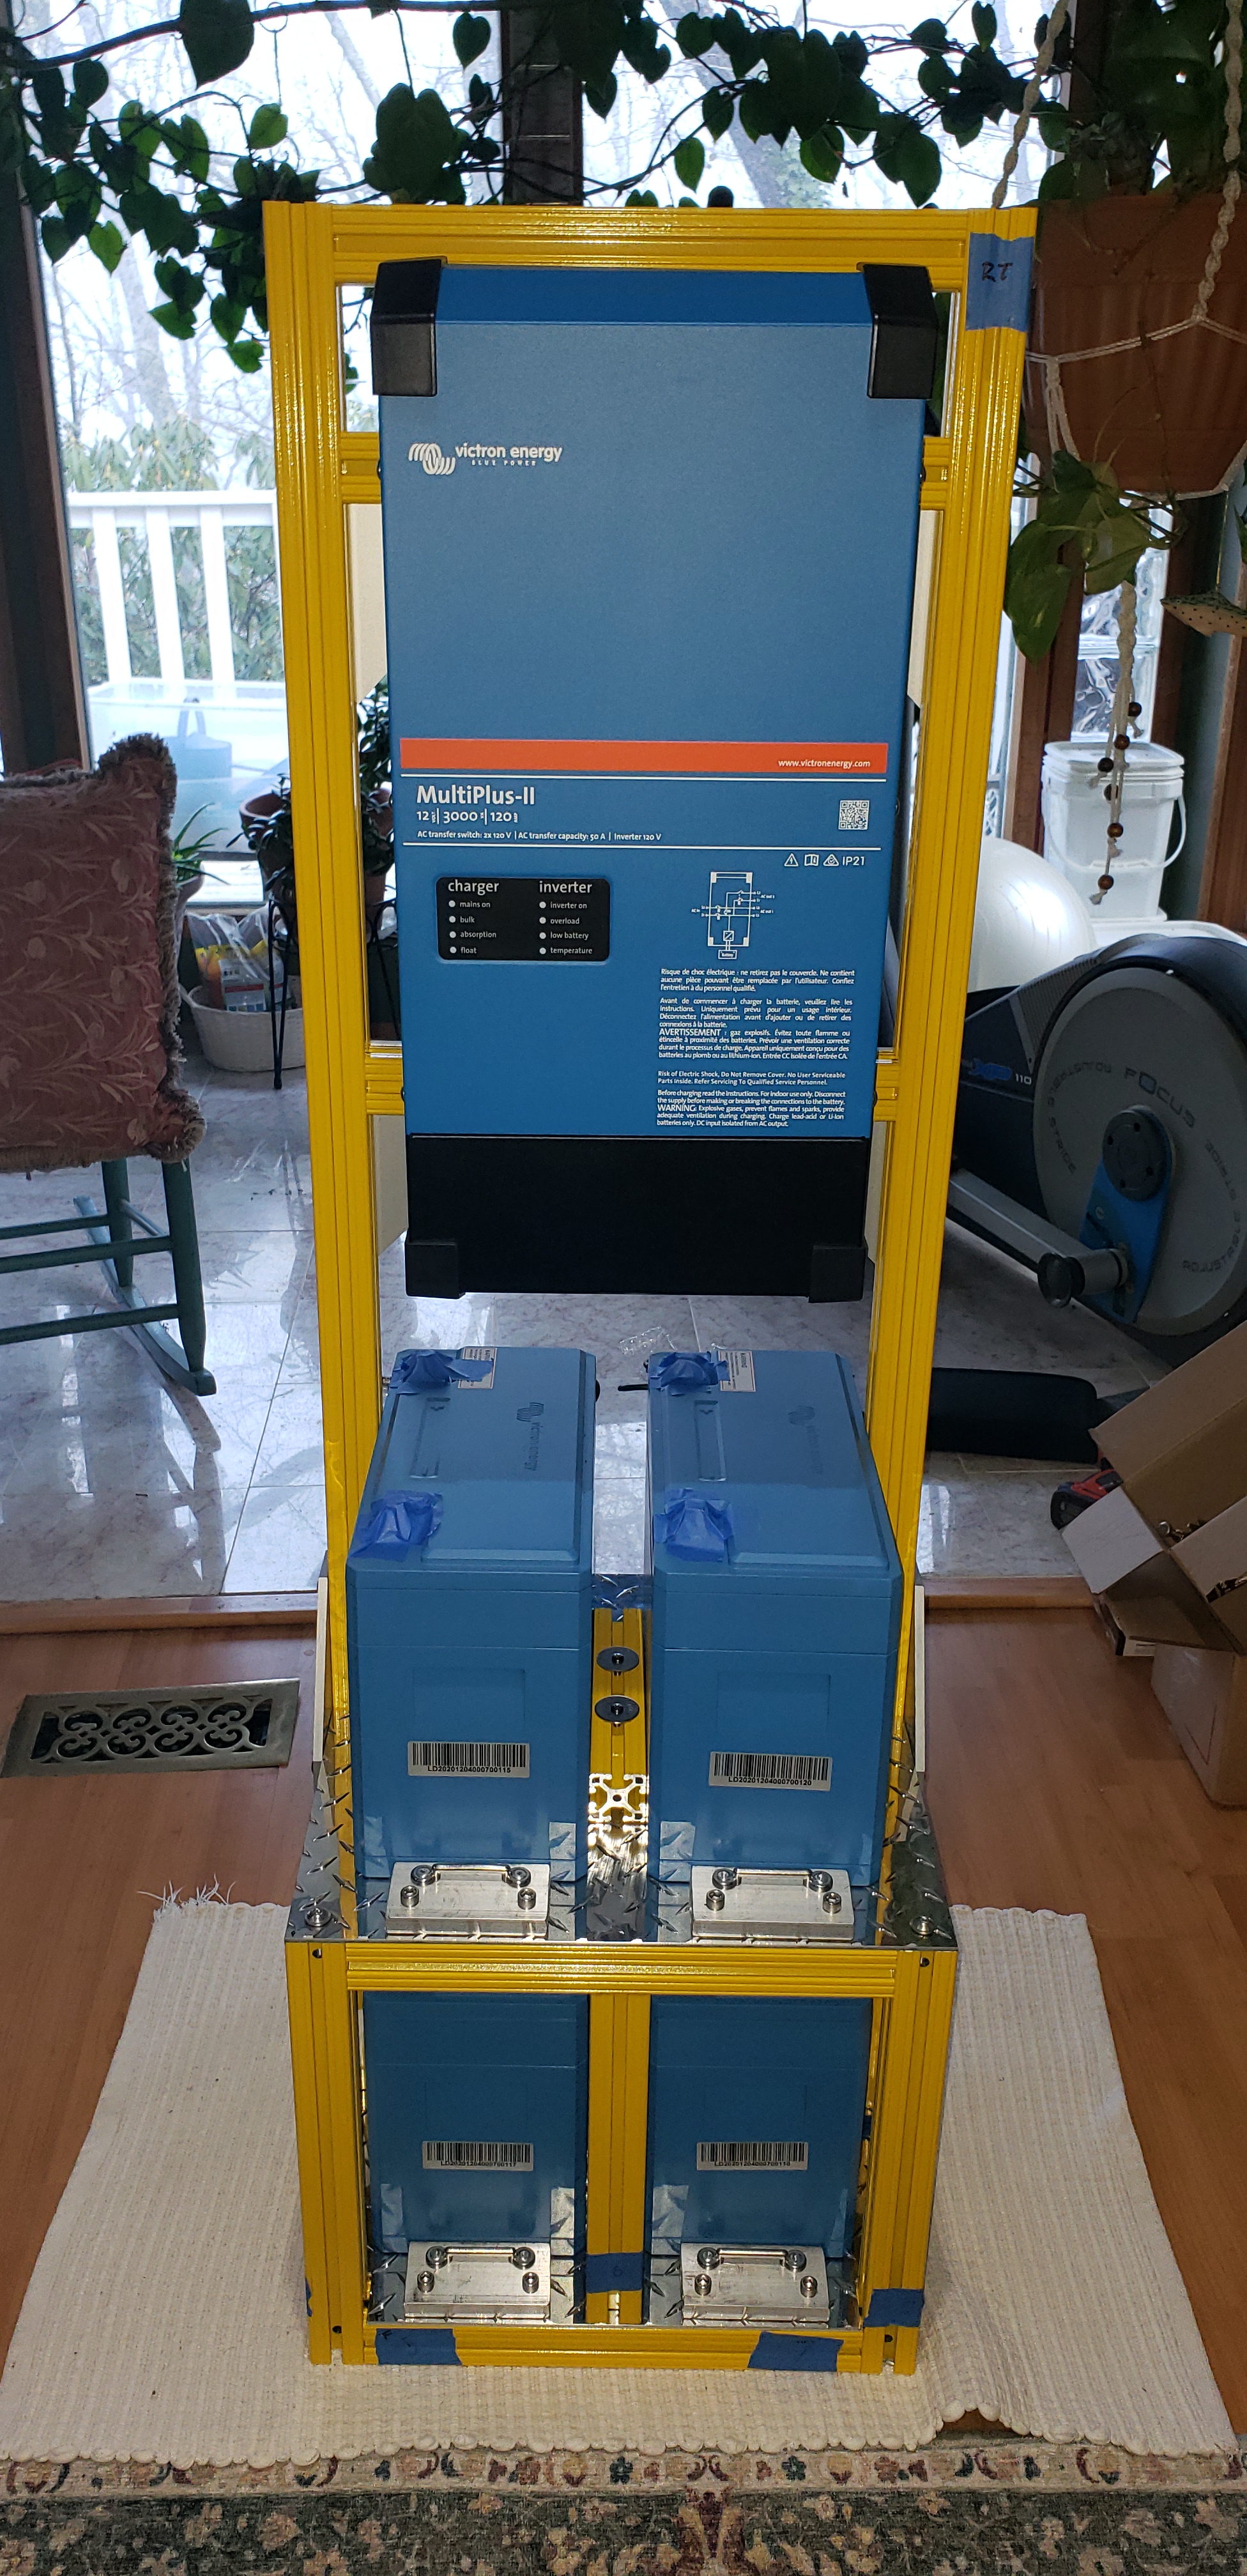
The aluminum blocks and yellow T-slot battery spacers are now in their final positions.

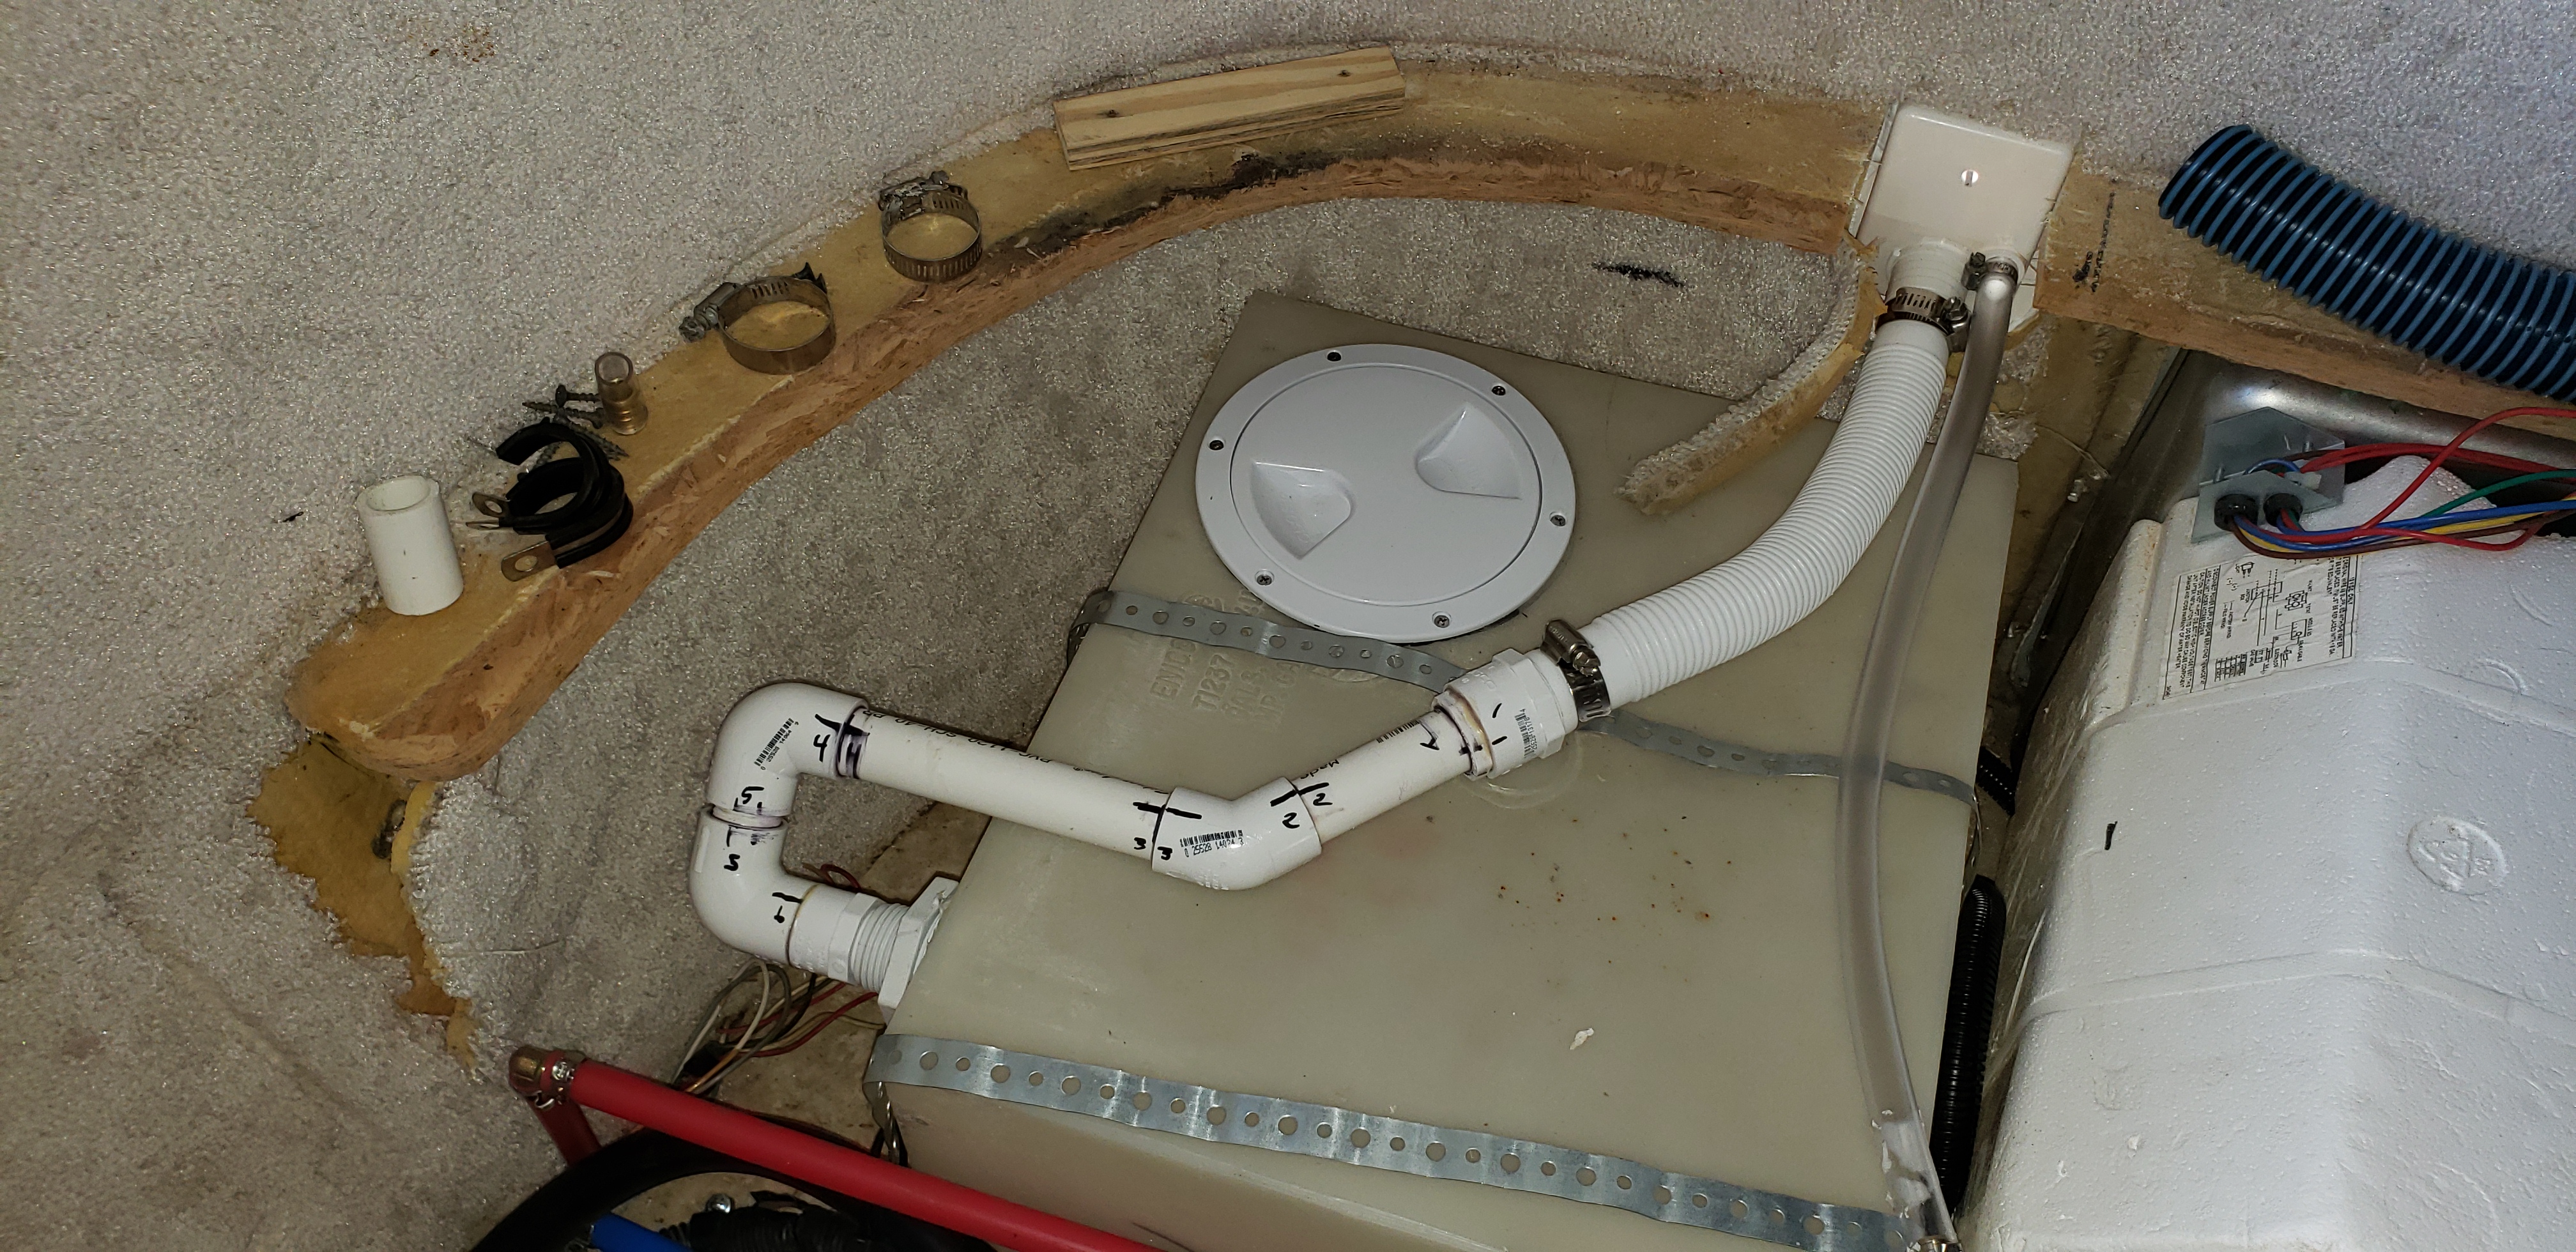
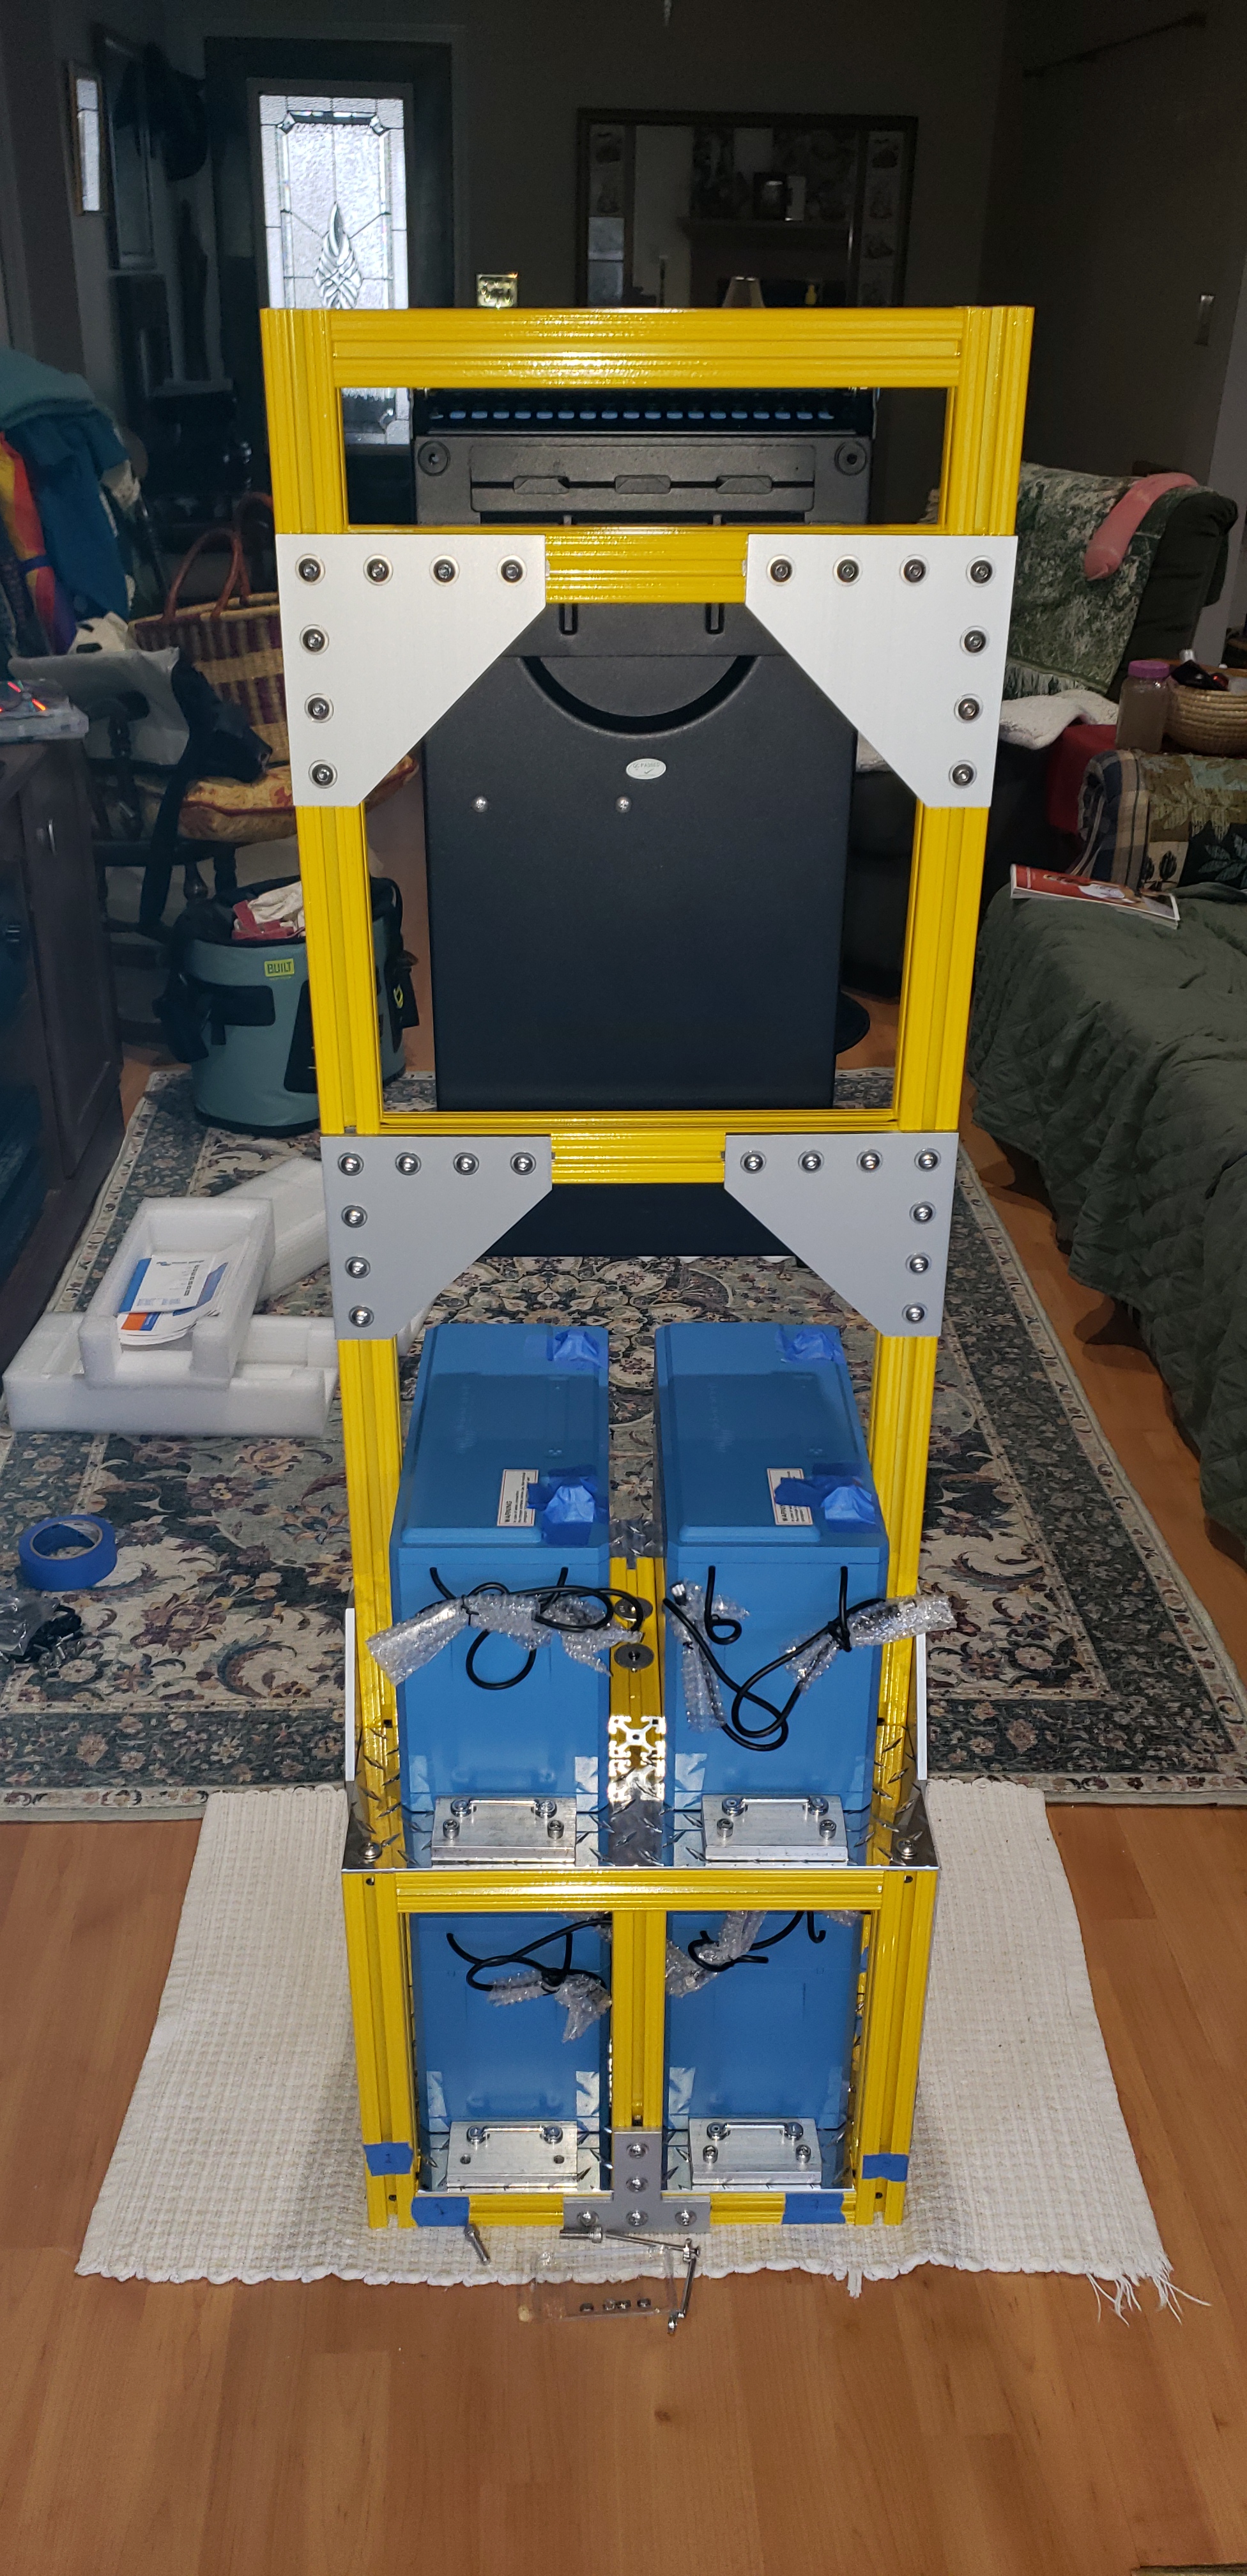
The back of the assembly. The large triangular gussets in the corners will serve to further strengthen the structure keeping it rigid and secure when the PoD is rolling down the road. A few small parts are still needed before the SiBaSS is complete and can finally be installed in the PoD.

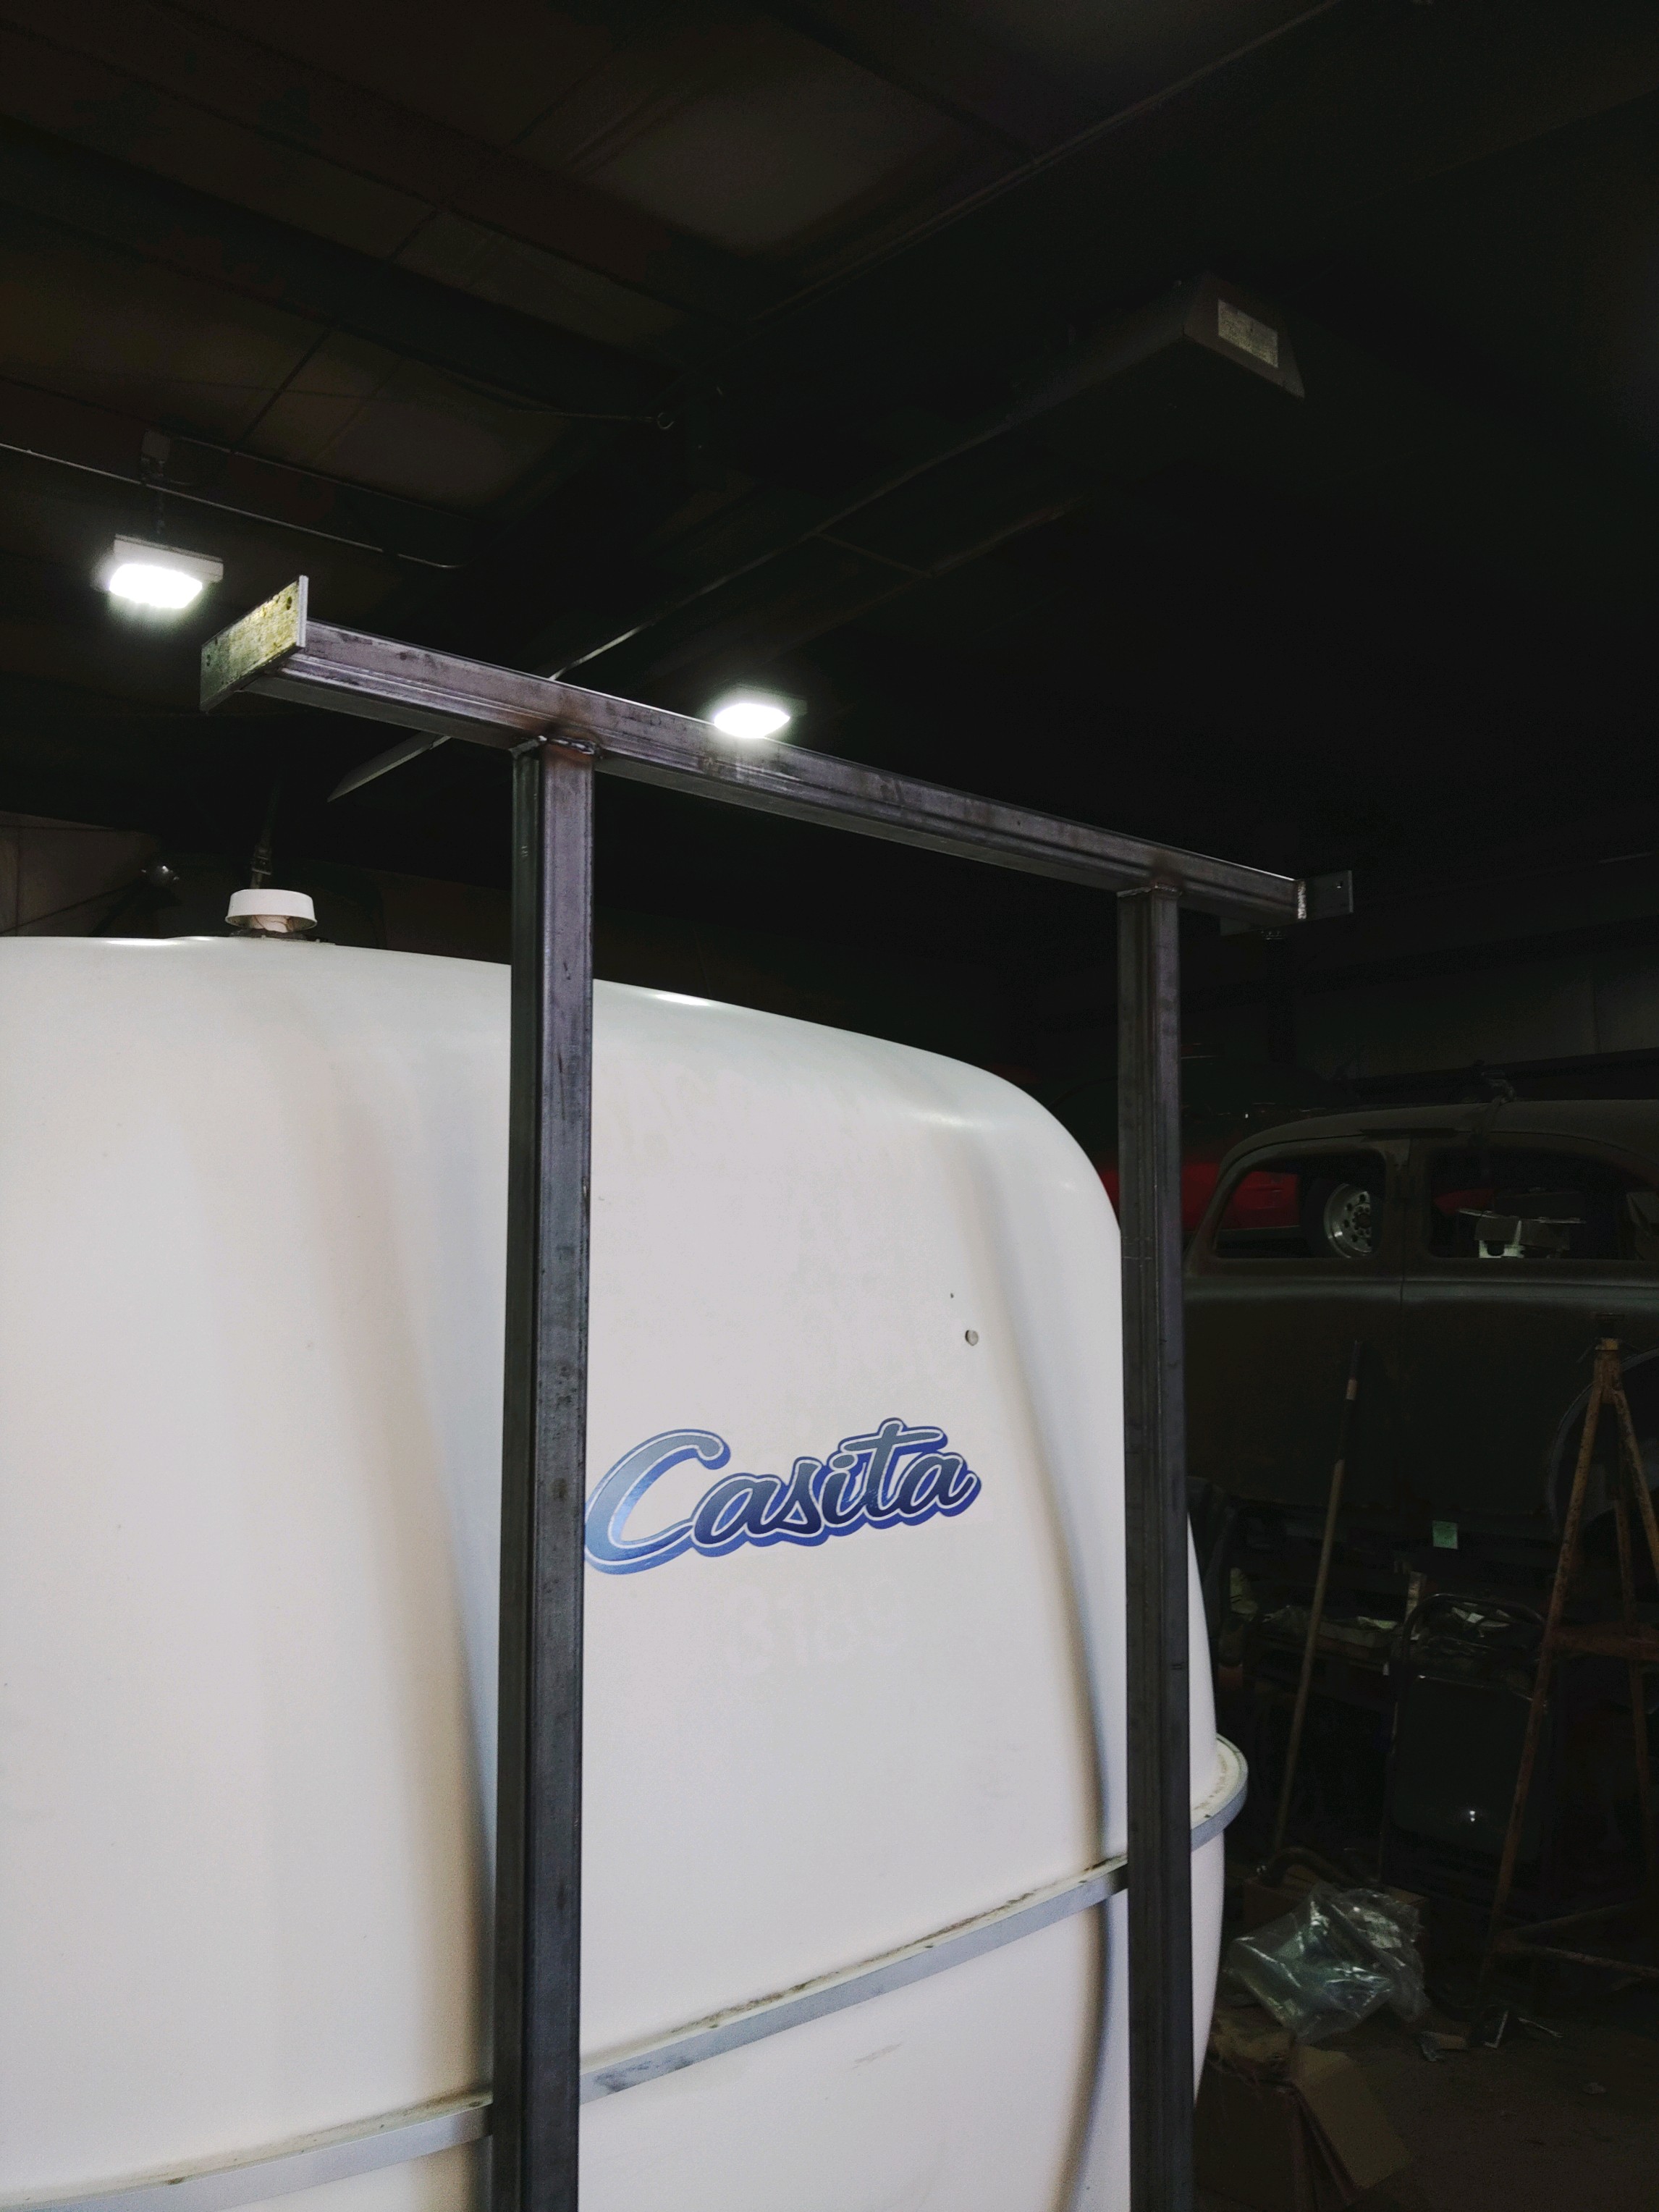
In other news, we have transported the PoD to the Red Dog the welder who is working his magic and, as I write this, installing the solar array support structure onto the PoD. Here are a few photos of this major step in the process. Below, Red is toting the PoD into the shop with his forklift.

The PoD in the shop. Note the plastic shields I installed over the future window holes and air conditioner service port in the side – it was raining. Of note – the skylight Jim and I fabricated and installed a few days ago had a very good test today and I am happy to report that it passed with zero leaks.

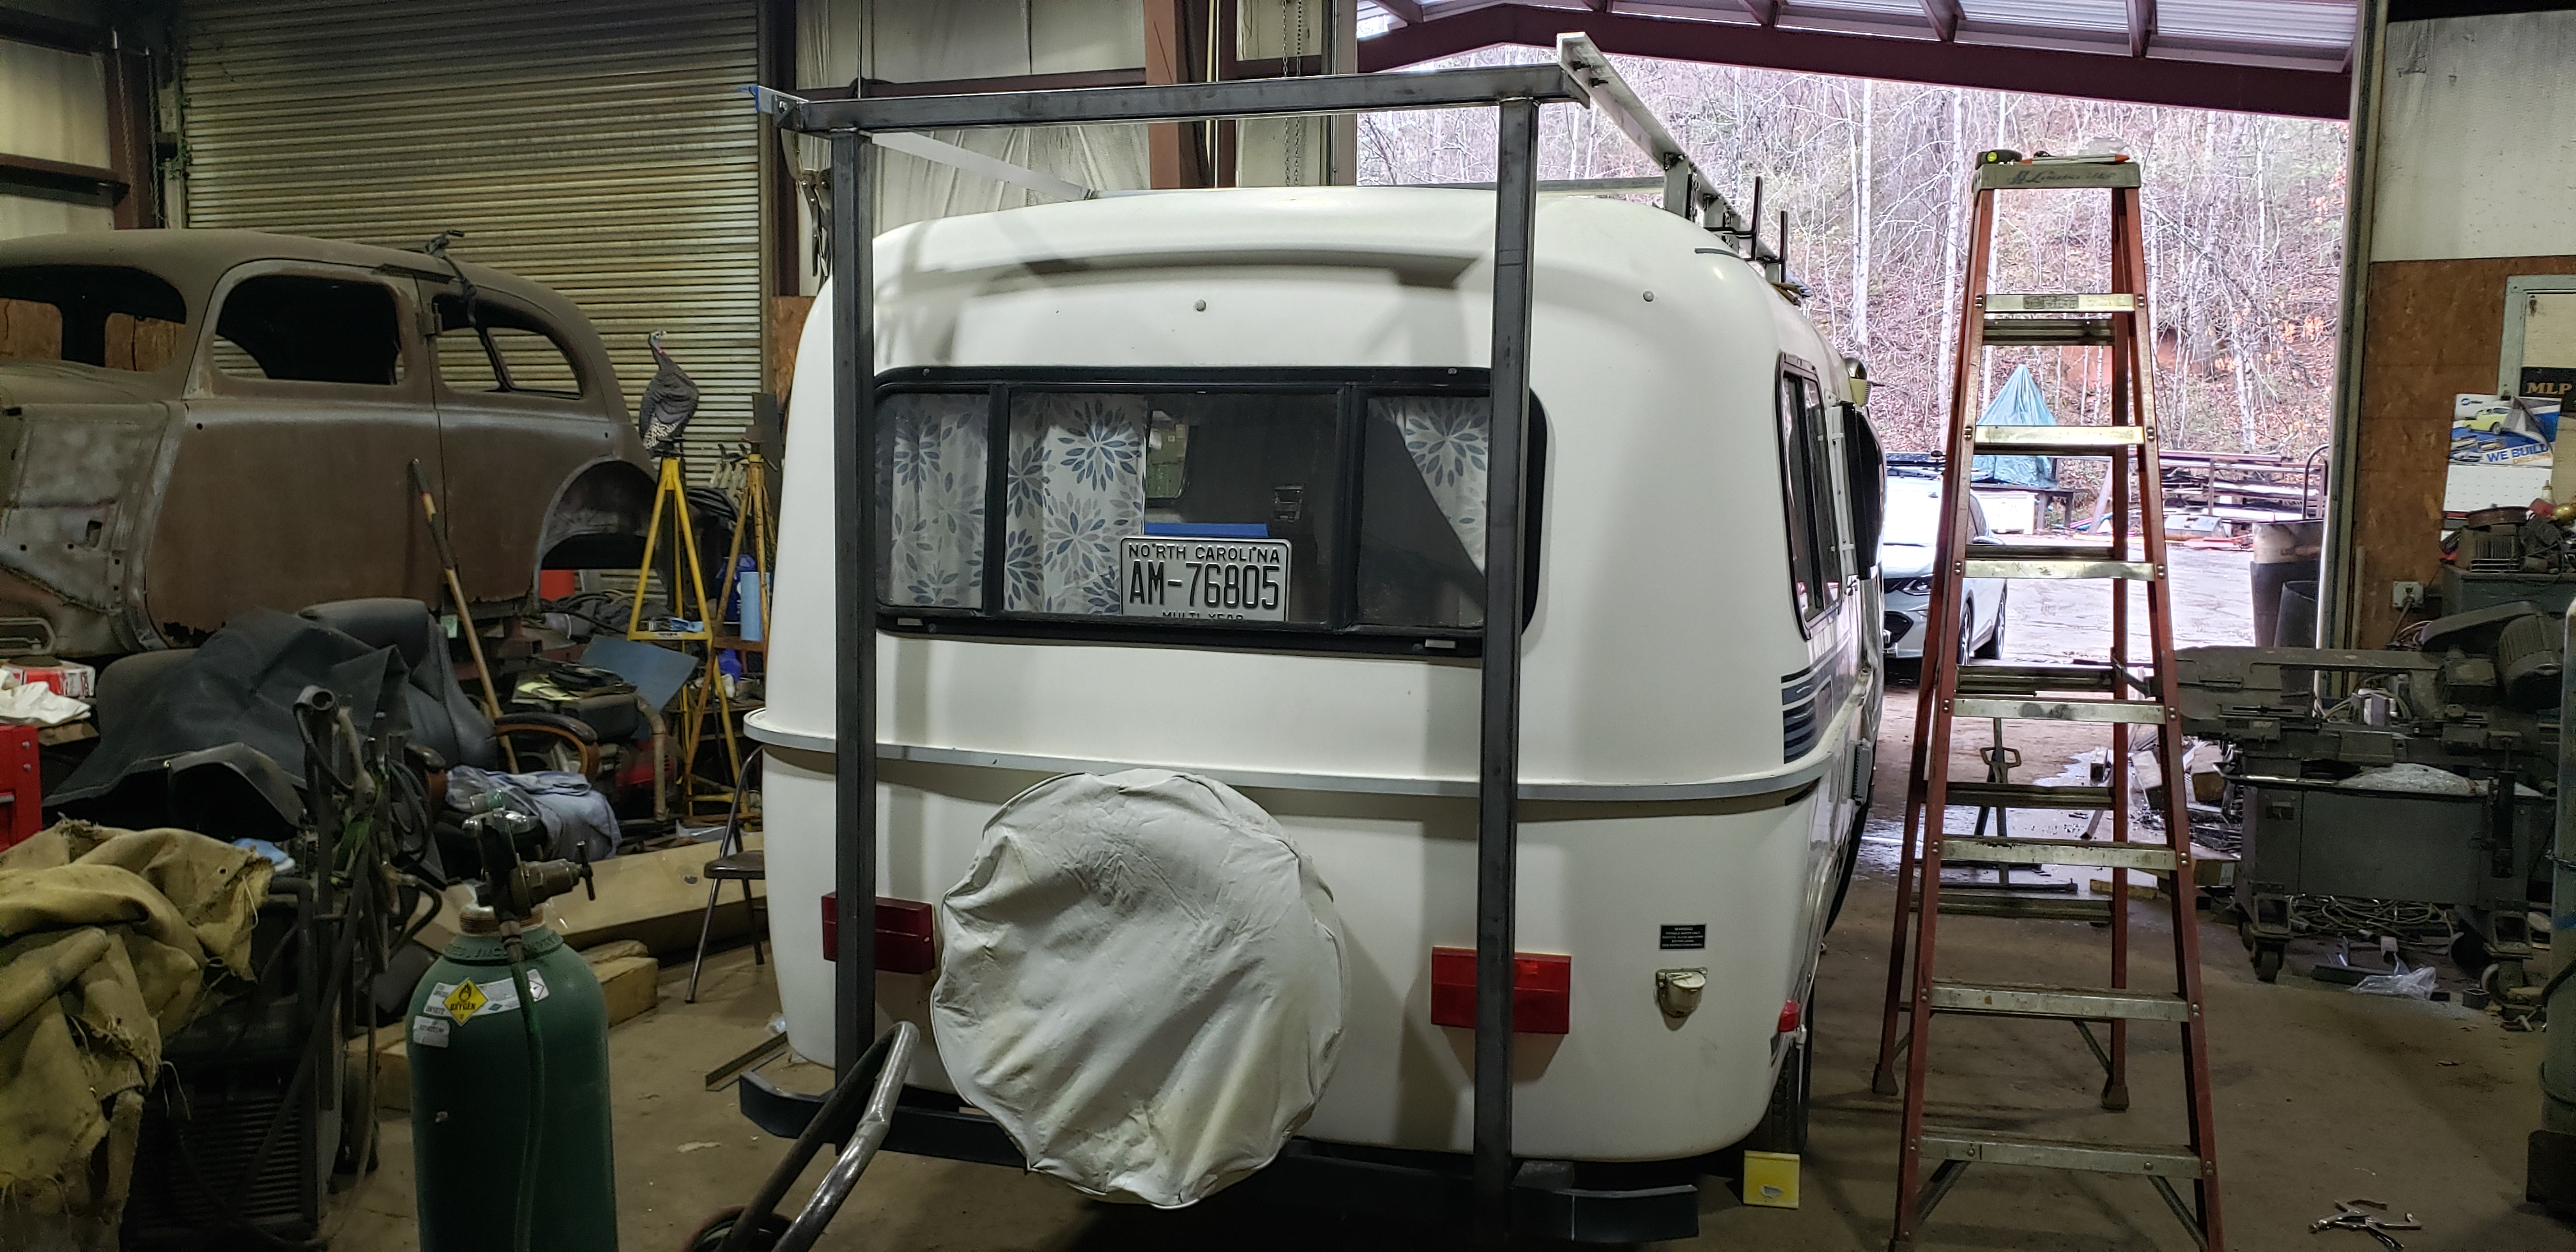
Day One: Getting ready to begin the welding job.

Hmmm, I might need to re-locate the brake lights to the other side of the steel support beams.

Getting things perfectly aligned before the welding begins.

Array support structure taking shape.

Precision cuts require precision tools.

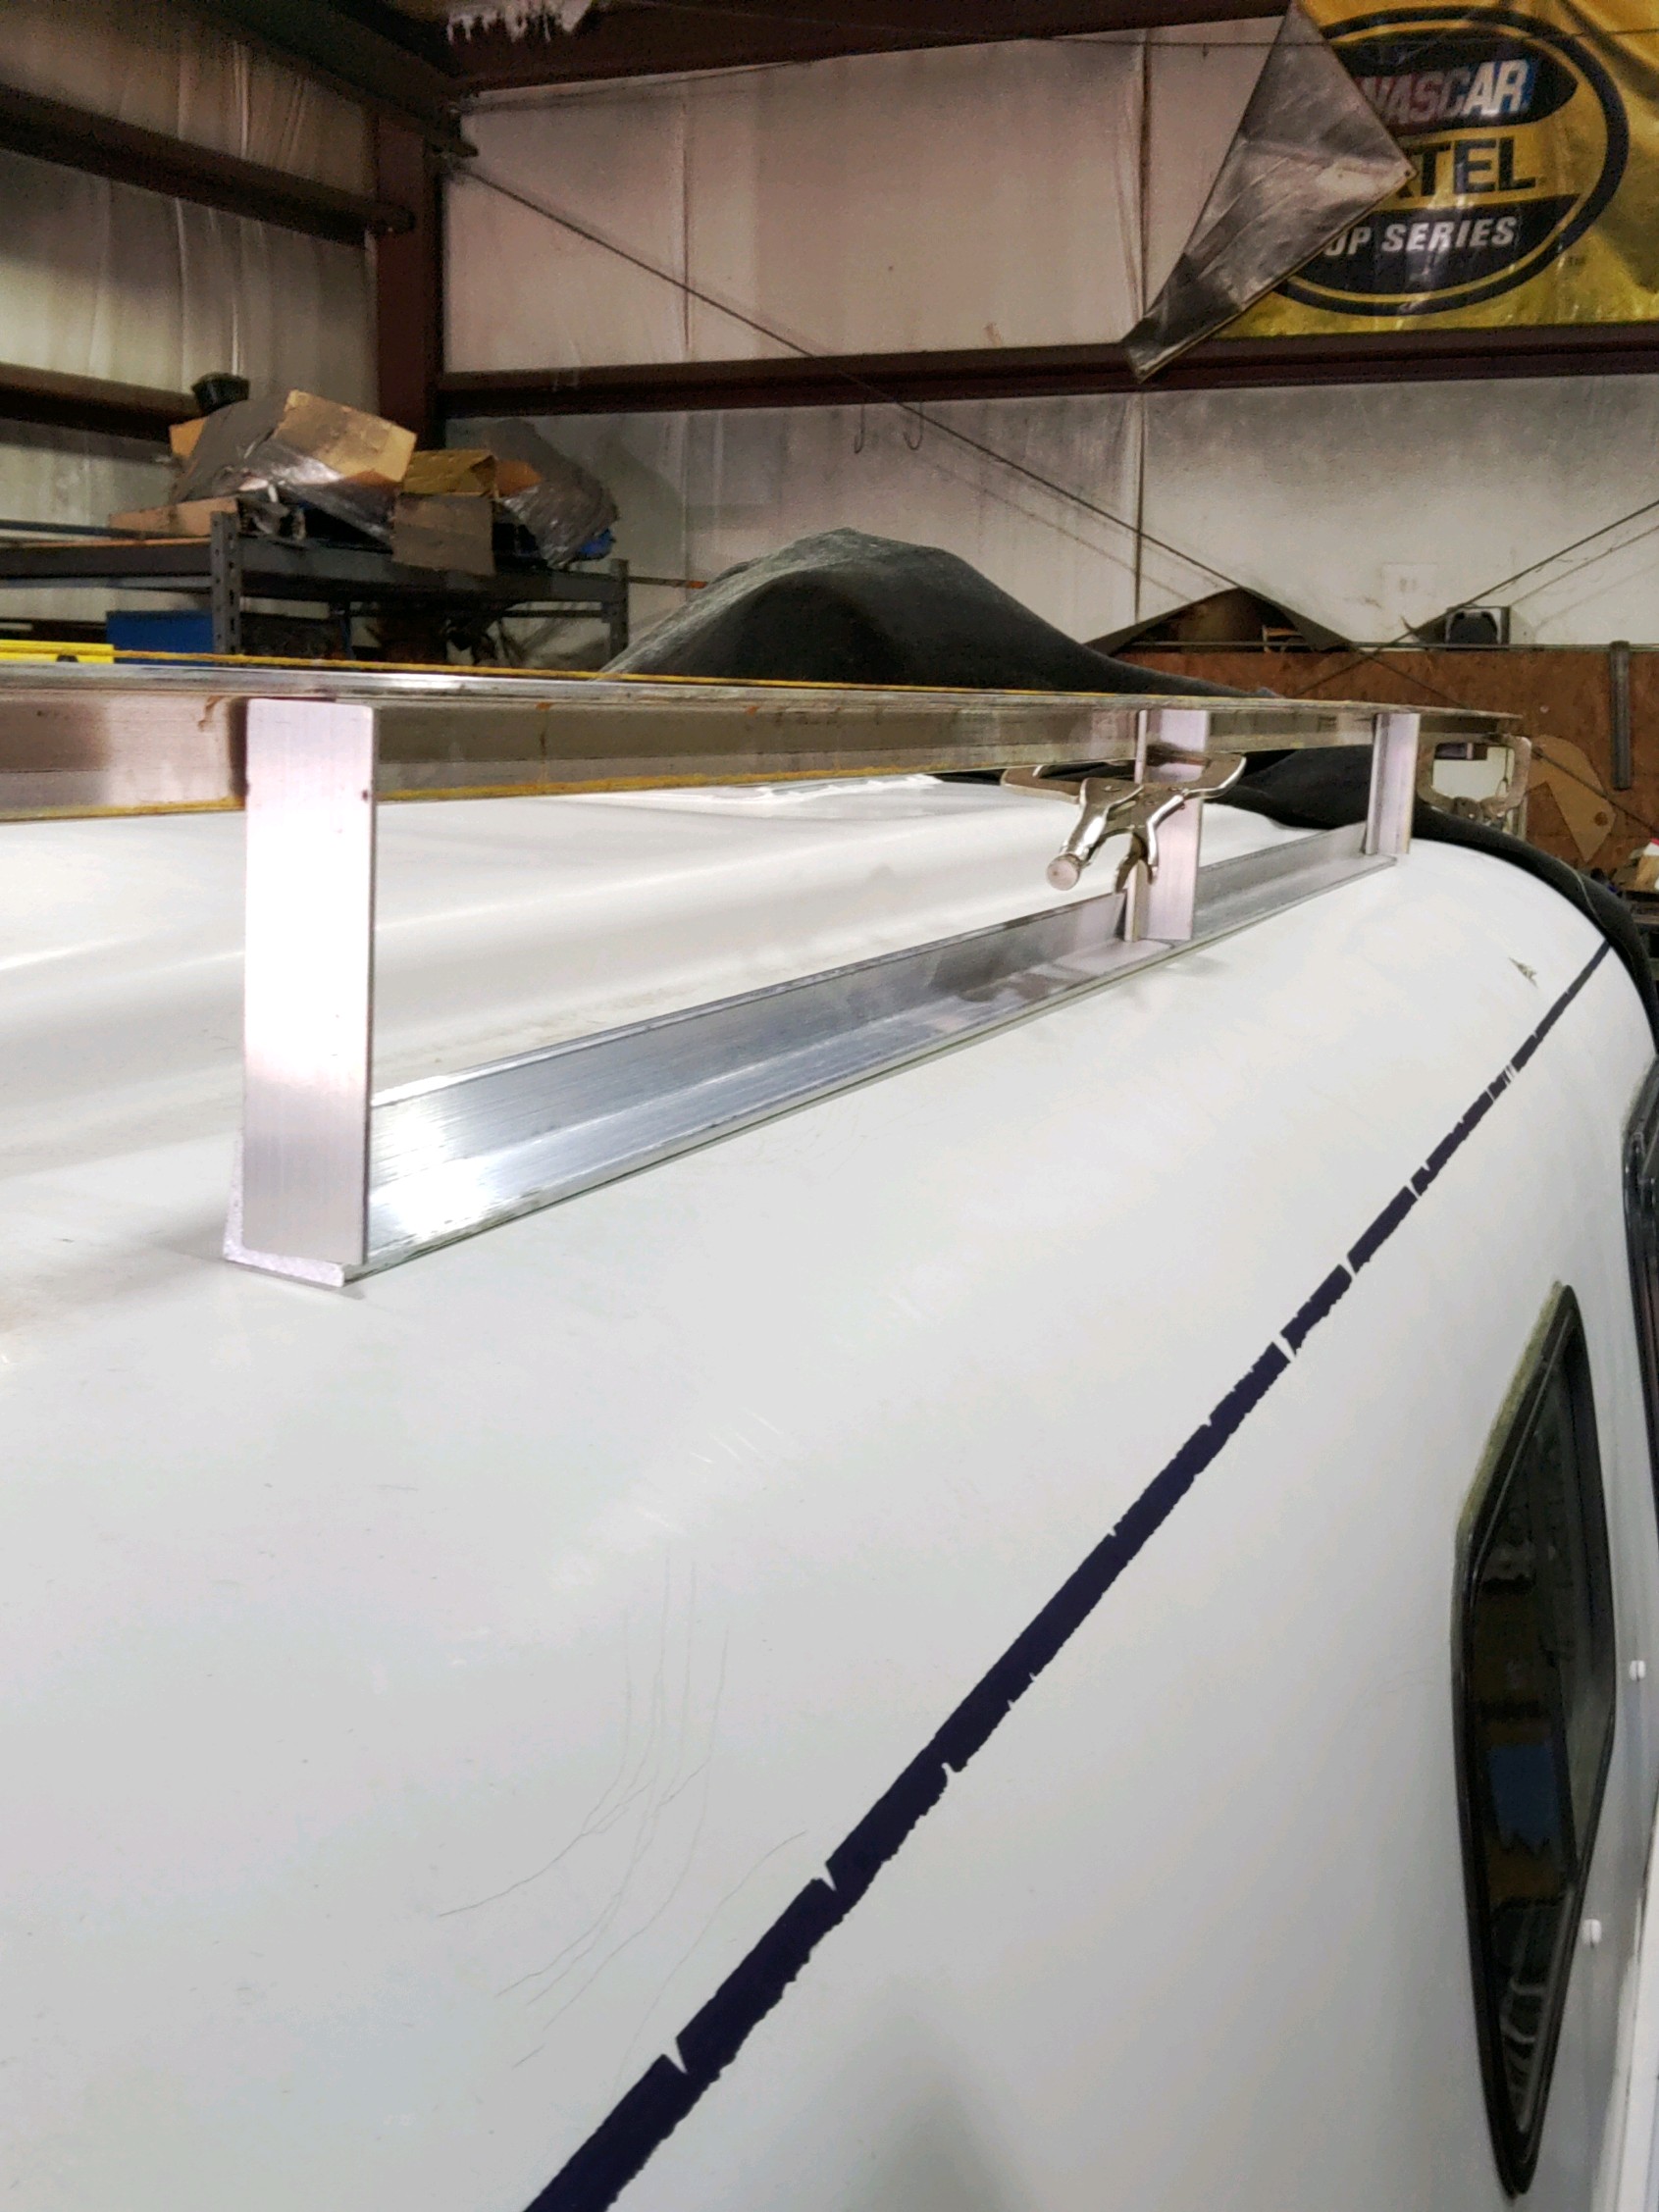
The solar array support rack being aligned. The solar modules (panels) will bolt directly to the shiny pieces of aluminum in the below photo.

This rack system is a special challenge since the roof of the PoD is made of fiberglass. The next photo shows one of the long “foot-like” structures Red is fabricating that will help to distribute the weight of the solar array and the awning over the entire rooftop.

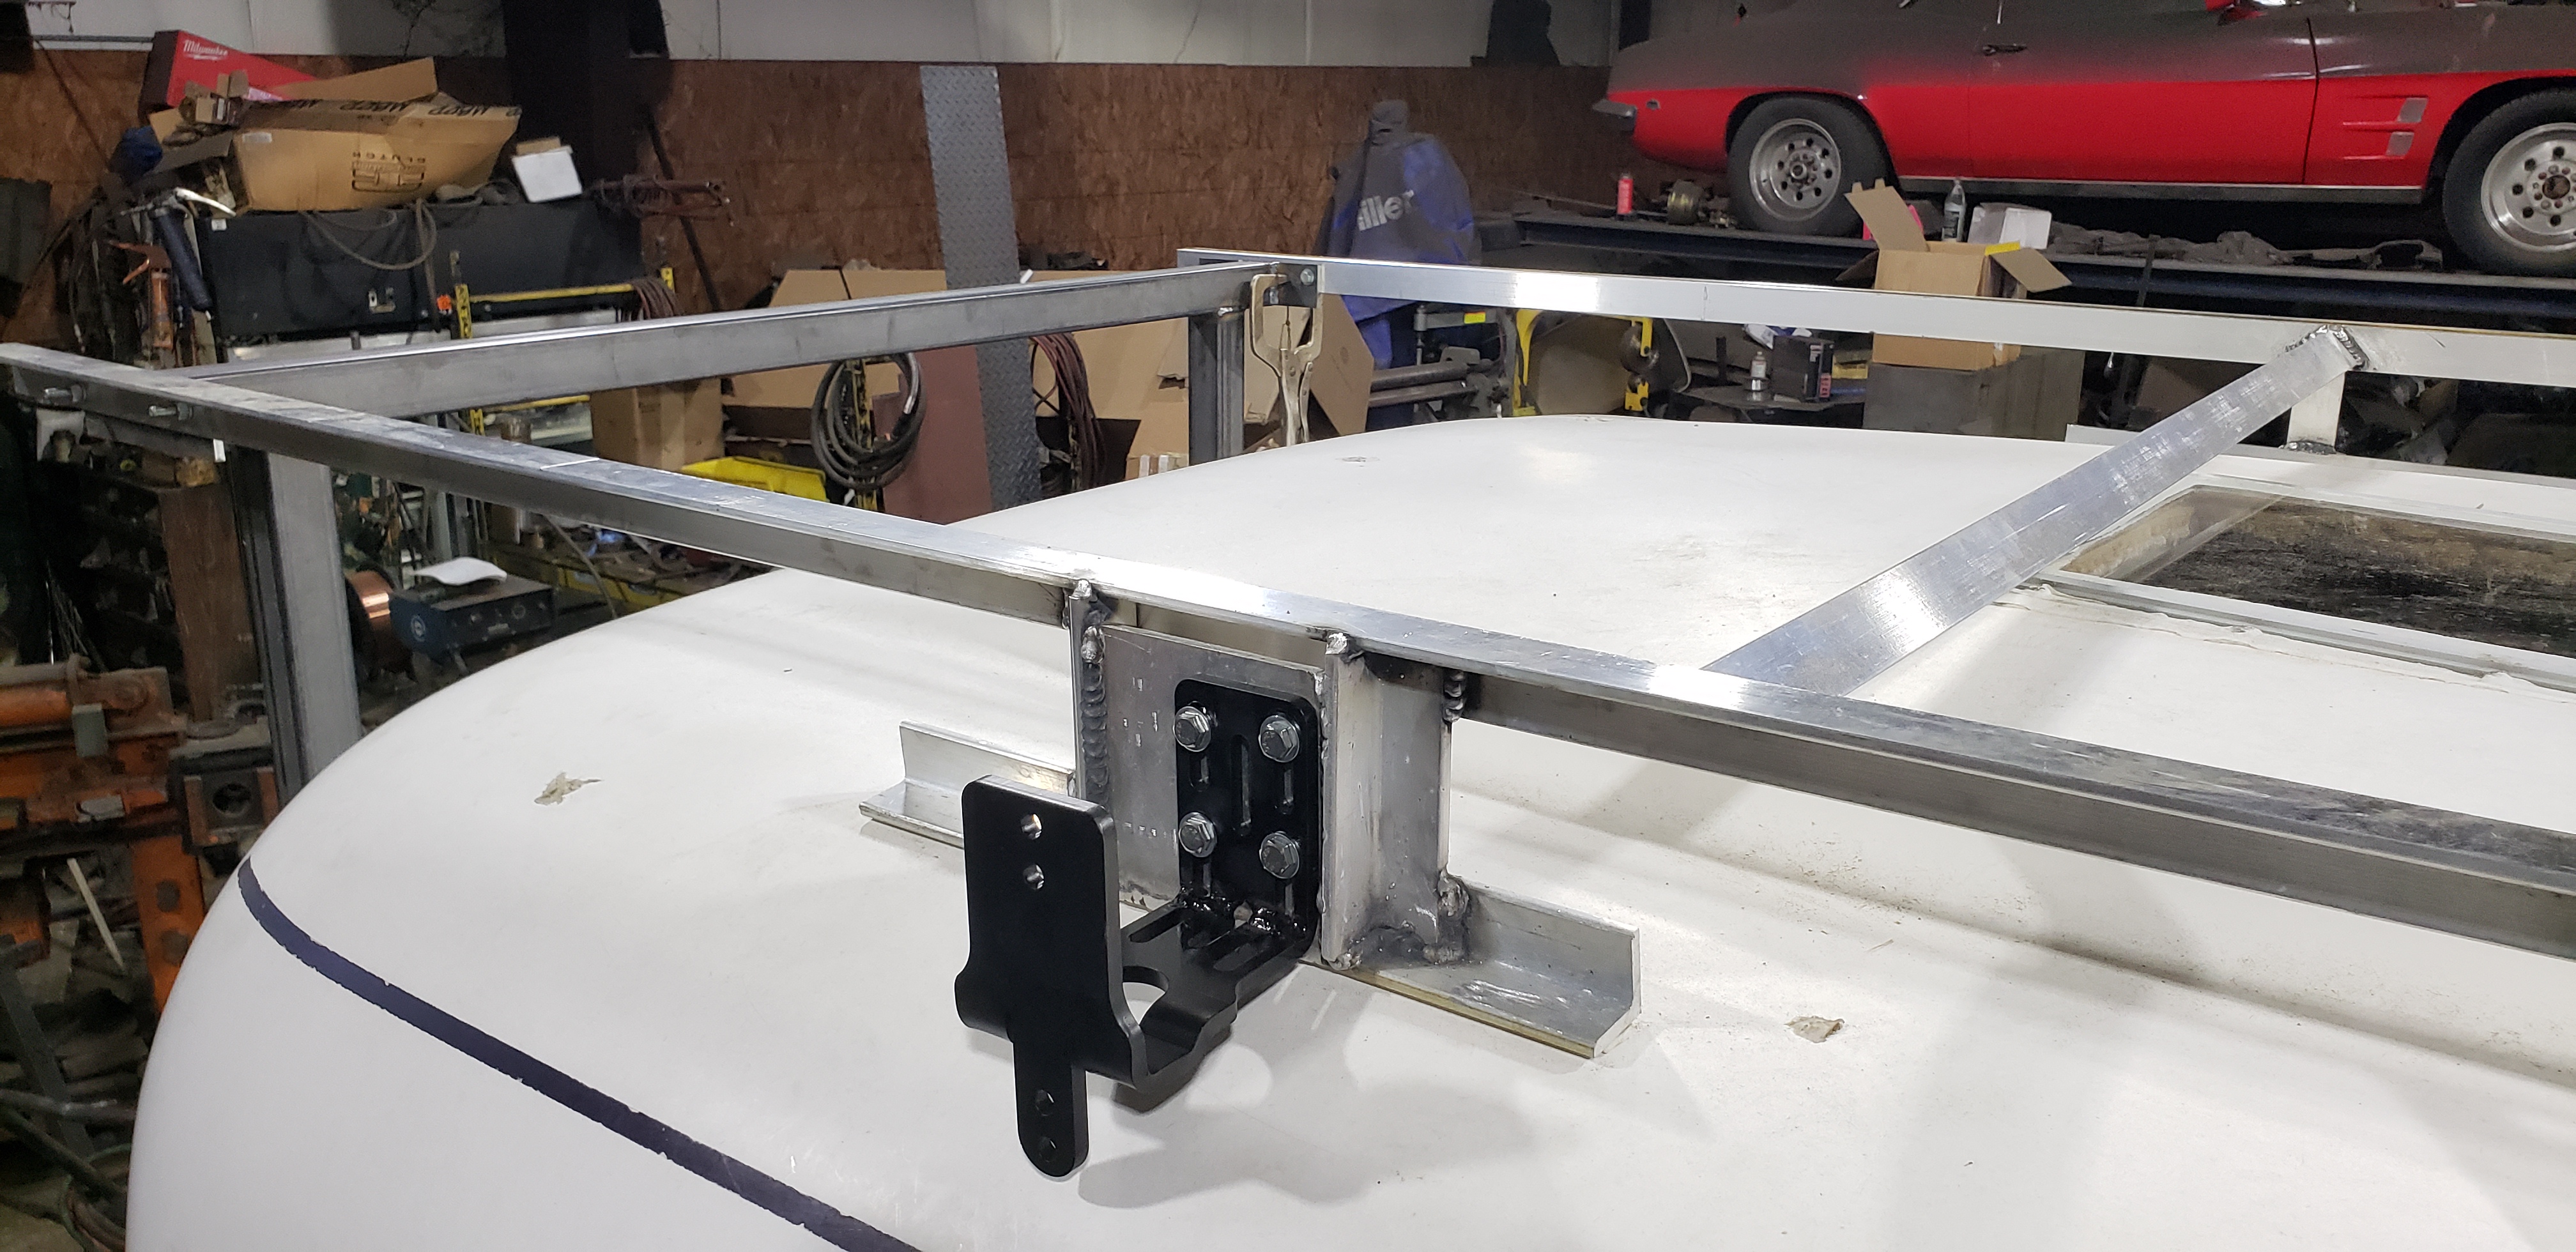
Day Two of the construction: the rack is starting to come together.

One of the three brackets where the awning will attach.

Stay tuned – there is much more to come.

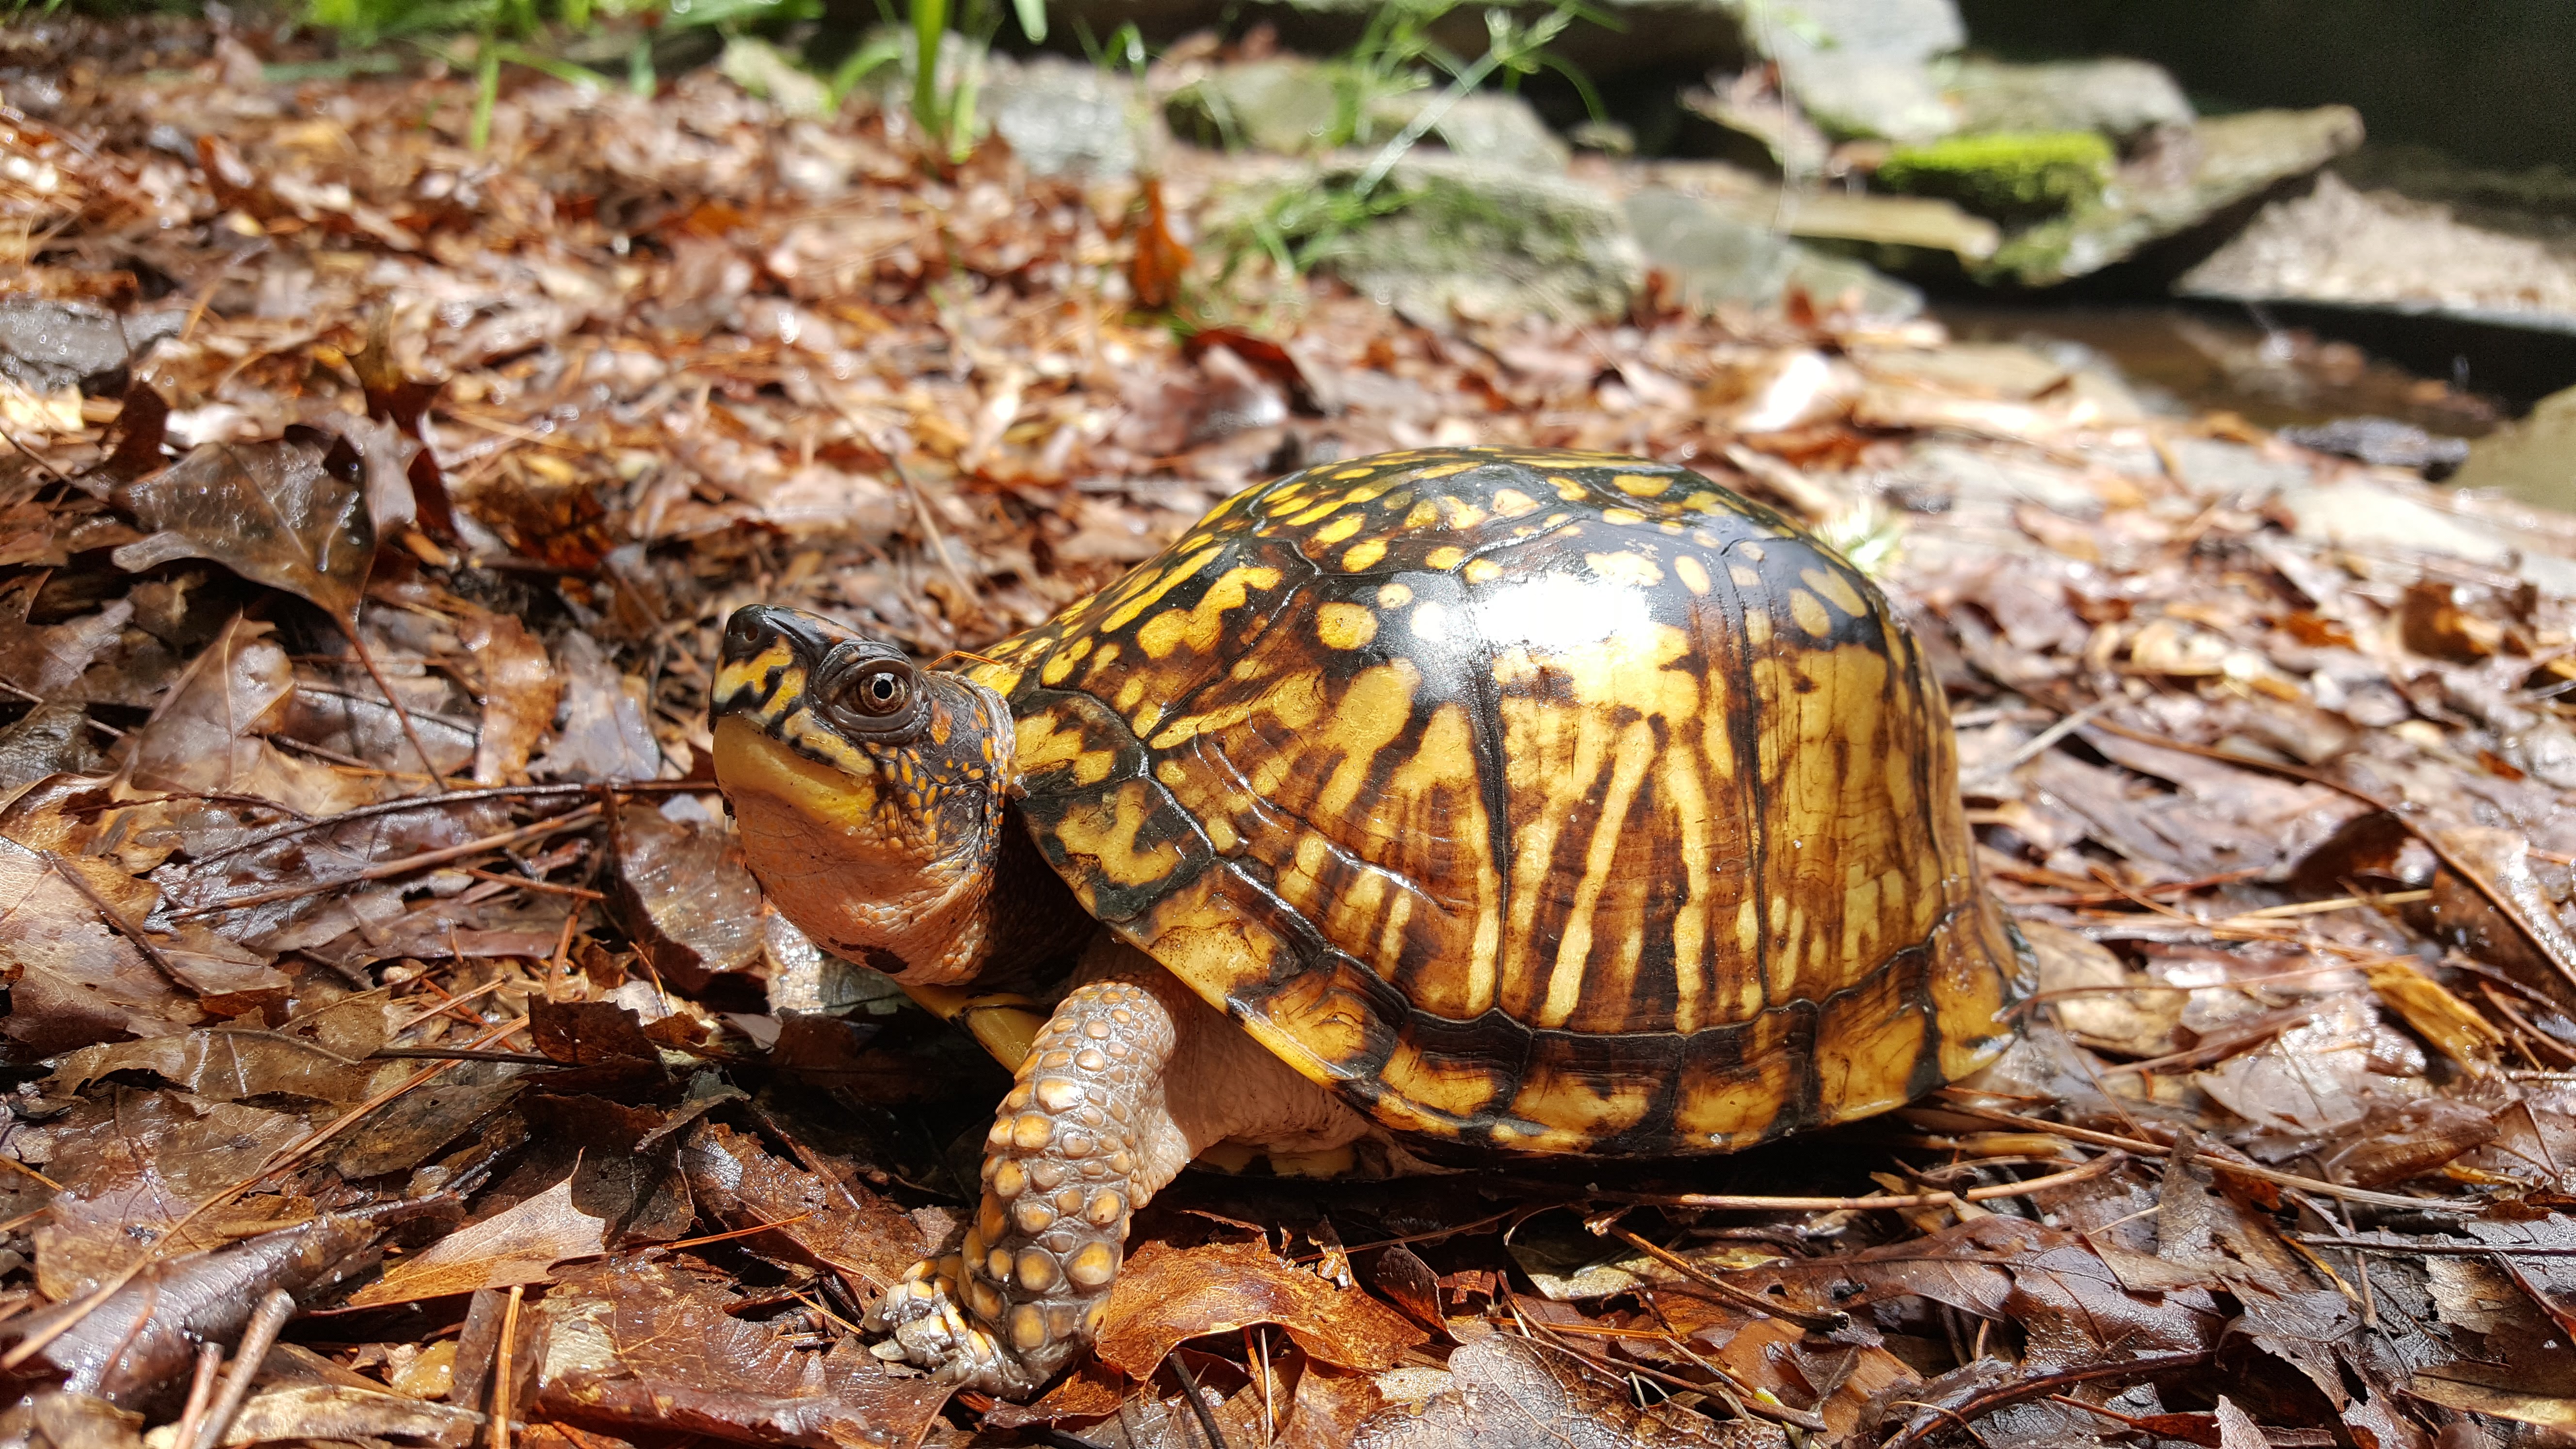
In closing, this is Tripod the Eastern box turtle – the ENP mascot. It will not be long before the warm sun of springtime awakens her from her long winter’s nap 🙂

Please subscribe and follow this blog for more updates.

We hope to have the ENP NaSA PoD in service on or before Earth Day 2022!

This amazing project will serve to inspire and educate all the curiosity seekers it will meet. But to do this right – we do still need your support. If you choose to assist us in making this project a reality, this unique mobile classroom will greatly benefit the nature and wildlife conservation, science, reality, common sense, and renewable energy awareness education for all our outreach program participants in the WNC region as well as our wonderful students at Trails Carolina and Trails Momentum who will all greatly benefit from the wonders it will contain while they are in class and in the field on expedition. 

 Please consider supporting this project via the donate link on our website or our GoFundMe page:   www.gofundme.com/lets-build-a-mobile-outreach-classroom

The construction and use of this unique mobile classroom will be documented on this blog, our end-of-year newsletter, and soon on our YouTube channel.  

 The ENP NaSA PoD and the Mighty Bolt EV (our primary outreach vehicle) are owned by ENP and used primarily as the ENP company outreach vehicle and mobile outreach classroom.  They will be charged and fueled primarily with cleanly generated electricity provided by the ENP/Trails student-built classroom solar array and NaSA PoD’s rooftop solar array. They will both serve as outstanding teaching tools for our Trails students, ENP outreach program participants, and everyone we meet via our outreach programs.

Please note: any/all ads that appear below this post are not provided or endorsed by ENP nor are we supported in any way by these ads – they are an automated feature of WordPress.com.

NaSA PoD Project Update #4

Yesterday I took the PoD to meet metal fabricator Tim from Appalachian Sheet Metal and Fabrication in Weaverville, NC. Tim made some detailed measurements of the side of the Casita where the custom windows will be installed. Below is a photo of Tim making his measurements in preparation for the fabrication of the window frames.

It will take a few weeks for Tim to work his magic but hopefully, by early April I will be able to share the details of what Tim has created for us.

Also today Jim and I installed the PoD’s new skylight in the hole left by the removal of the old roof vent fan. In the next sequence of photos, you will see the process from start to finish. The first photo is taken from the roof of the Casita before I prepped the area around the hole in the roof. You can see the remnants of the old sealant as well as several broken screws sticking through the roof.

The old sealant came off easily with a razor blade but the old screw shafts had to be filed down to the roof-line with a metal file – that took a while. In the next photo, the surface has been prepped and cleaned and all screw shafts have been filed down.

Next Jim and I constructed the aluminum frames to hold the Lexan skylight. This was not as easy as it sounds and I could never have done it alone – Jim’s knowledge, expertise, and very nice tools allowed us to miter the corners of the frames and get everything lined up in preparation for installation

THANK YOU JIM!!

This is a photo of the skylight in its frame (with protective blue plastic coverings) just before I installed it on the roof.

In this next photo, we see the skylight installed in its final location on the rooftop with plenty of sealant under and around the skylight.

We needed to create a custom ultra-low-profile skylight since the solar array and its frame will need to be placed as close to the roofline as possible. An interesting point of note is that soon, with the placement of the solar array above the roof – the sky will not be very visible through this skylight. Maybe when that happens we will need to call it a solar array viewing port.

Soon, when the weather returns to something like spring (it is now 20F and windy with a dusting of snow on the ground!) I will work to install a trim piece around the interior of the skylight port…which at the moment appears as in the next photo (taken before I installed the skylight). The top layer is the fiberglass shell of the RV. Below that is a gap of about 1/2 inch, then the foam backing of the carpet, and finally the carpet itself. I plan to install an edge-hiding trim piece around the carpet and then glue the carpet up to the ceiling with construction glue…but to do that we will need warmer weather.

That is where we are in the build at the moment and we hope to have much warmer weather soon – so hopefully, more modifications will happen much faster.

I leave you with two of my furry family members who were enjoying the sunshine while Jim and I worked on the PoD. That is Cosmo the cat in the foreground rolling in the warm moss, and Tangie the “Carolina Mountain Red Dog” (rescued mixed-breed terrier thing) in the background. They both love the warmth of the early spring sunshine 🙂

We hope to have the ENP NaSA PoD in service on or before Earth Day 2022!

Stay tuned – there is much more to come.

Please subscribe and follow this blog for more updates.

This is an amazing project that will serve to educate and inspire all the curiosity seekers it meets. But to do this thing right – we do still need your support. If you choose to assist us in making this project a reality, this unique mobile classroom will greatly benefit the nature and wildlife conservation, science, and renewable energy awareness education of all of our outreach program participants in the WNC region as well as our wonderful students at Trails Carolina and Trails Momentum who will all greatly benefit from the wonders it will contain while they are in the field on expedition. 

 Please consider supporting this project via the donate link on our website or our GoFundMe page:   www.gofundme.com/lets-build-a-mobile-outreach-classroom

The construction and use of this unique mobile classroom will be documented on this blog, our end-of-year newsletter, and soon on our YouTube channel.  

 The ENP NaSA PoD and the Mighty Bolt EV (our primary outreach vehicle) are owned by ENP and used primarily as the ENP company outreach vehicle and mobile outreach classroom.  They will be charged and fueled primarily with cleanly generated electricity provided by the ENP/Trails student-built classroom solar array and NaSA PoD’s rooftop solar array. They will serve as outstanding teaching tools for our Trails students, ENP outreach program participants, and everyone we meet via our outreach programs.

Please note: any/all ads that appear below this post are not provided or endorsed by ENP nor are we supported in any way by these ads – they are an automated feature of WordPress.com.

NaSA PoD Project Update #3

Over the past few days, much progress has been made.

The new door latch has been installed and works fabulously!

Over the last week or so I have also been working to get the PoD’s water system installed. This will be needed to supply the PoD’s human and animal inhabitants with life-giving water during outreach events -especially multi-day events – and allow the humans to grab a shower after the end of a long day of bringing nature and science knowledge to the masses 🙂 The mass of the 25 gallons (200 lbs) of water in the two tanks (the 3rd is the water heater) will also serve as a ballast system to help counter-balance the added mass in the solar-electronics cabinet.

Step one: Find a place to install the new water tank – this looks like a good location.

Step two: move the water pump to a new location.

Step Three: replace old water pipes with new PEX water pipes.

…and even more new pipes. In the next photo, you can see how all the various water pipes connect the two tanks allowing them to balance the water supply between the two tanks. The off-white upper tank pictured in this image is also where the water filler is located – its fill hatch is on the outside of the vehicle at the end of the white PVC tube on top of the tank. Also in this photo, you can see the new 50 Amp shore power connection cable coiled on the bottom right of the image.

We also installed the new water filler hatch – but we first had to make a larger hole. We made the new hatch hole using an existing hole – the old 12-volt battery off-gassing hole – a bit larger to accommodate the new fill point.

This is what the old battery vent port looked like before we modified it.

Marking the new hole…

Cutting the new hole…

The new water filler port installed.

We also installed a new shore power cord port after the original unit suffered a RUD (Rapid Unscheduled Disassembly) while I was attempting to open it one cold day in February – the plastic was old and brittle and just fell apart in my hands. Hopefully, this new one will serve us for many years.

Back to the water system.

After the pump and all the pipes were in place, we then installed the new 9-gallon water tank.

The system is not yet connected and tested since we are missing a few small water line adapters that we could not source locally. They should arrive later this week and will complete the final connections that will make the new water system complete. If you look closely in this image and to the left of the center you will see where the adapters are needed – where the blue water line ends in a brass 90-degree elbow fitting – it is at this location where we need to have a unique small adapter to connect the water line to the tank. We also need to install a system drain valve – it will go in the space above the brass elbow I just mentioned and will have an outlet tube that passes through the RV’s floor allowing the system to be fully drained in the event of cold weather.

We also installed a clean-out port (the circular white port in the top of the original water tank in the below photo) as well as the new filler line between the tank and the externally mounted gravity fill port we mentioned earlier. The clear hose on the right is part of the water system’s air venting system.

We filled some old gas line and drain holes with body putty then drilled some huge holes through the floor of the RV and into the frame and then preliminarily installed the raised and strengthened sub-floor in the soon-to-be solar-electronics cabinet. It is not bolted in place just yet – we still need to sand and paint the fiberglass walls, let them dry, then we will be able to bolt it all together – but to do that, we need warmer weather…

We installed an external weather-proof heavy-duty outlet. This will be used to power the presentation monitor as well as the microscope station and Level 1 EVSE (electric car charger).

Lastly, we preliminarily mounted the final two Victron solar storage batteries on their support structure and then compared them to the cardboard analogue we constructed several weeks ago. The cardboard unit is smaller because it was constructed without a frame – but not to worry – the support frame’s measurements were accounted for so all should fit nicely in the new solar-electronics cabinet.

The carport staging area is looking crowded. Hopefully, we will soon be able to start putting all these parts back into the PoD.

A great photo from many years ago. During this week in 2017, I took this photo of the first toad of spring. Note: the First Phase of our classroom solar array is in the process of being constructed in the background 🙂

That is where we are in the build at the moment and we hope to have much warmer weather soon – so hopefully, more modifications will happen much faster.

Currently, we are still waiting for word from the welder and trying to find a sheet metal fabricator. Once they work their magic we will be able to install the solar modules and continue with the installation of further components. Warmer weather in the early spring will be most helpful and much will happen fast so please subscribe and follow this blog for more updates on this unique project!

We hope to have the ENP NaSA PoD in service on or before Earth Day 2022!

Stay tuned – there is much more to come.

Please subscribe and follow this blog for more updates.

This is an amazing project that will serve to educate and inspire all the curiosity seekers it meets. But to do this thing right – we do still need your support. If you choose to assist us in making this project a reality, this unique mobile classroom will greatly benefit the nature and wildlife conservation, science, and renewable energy awareness education of all of our outreach program participants in the WNC region as well as our wonderful students at Trails Carolina and Trails Momentum who will all greatly benefit from the wonders it will contain while they are in the field on expedition. 

 Please consider supporting this project via the donate link on our website or our GoFundMe page:   www.gofundme.com/lets-build-a-mobile-outreach-classroom

The construction and use of this unique mobile classroom will be documented on this blog, our end-of-year newsletter, and soon on our YouTube channel.  

 The ENP NaSA PoD and the Mighty Bolt EV (our primary outreach vehicle) are owned by ENP and used primarily as the ENP company outreach vehicle and mobile outreach classroom.  They will be charged and fueled primarily with cleanly generated electricity provided by the ENP/Trails student-built classroom solar array and NaSA PoD’s rooftop solar array. They will serve as outstanding teaching tools for our Trails students, ENP outreach program participants, and everyone we meet via our outreach programs.

Please note: any/all ads that appear below this post are not provided or endorsed by ENP nor are we supported in any way by these ads – they are an automated feature of WordPress.com.